Monday, January 23, 2006

Artery Clogging Cream Cheese Spirals or Rugelach


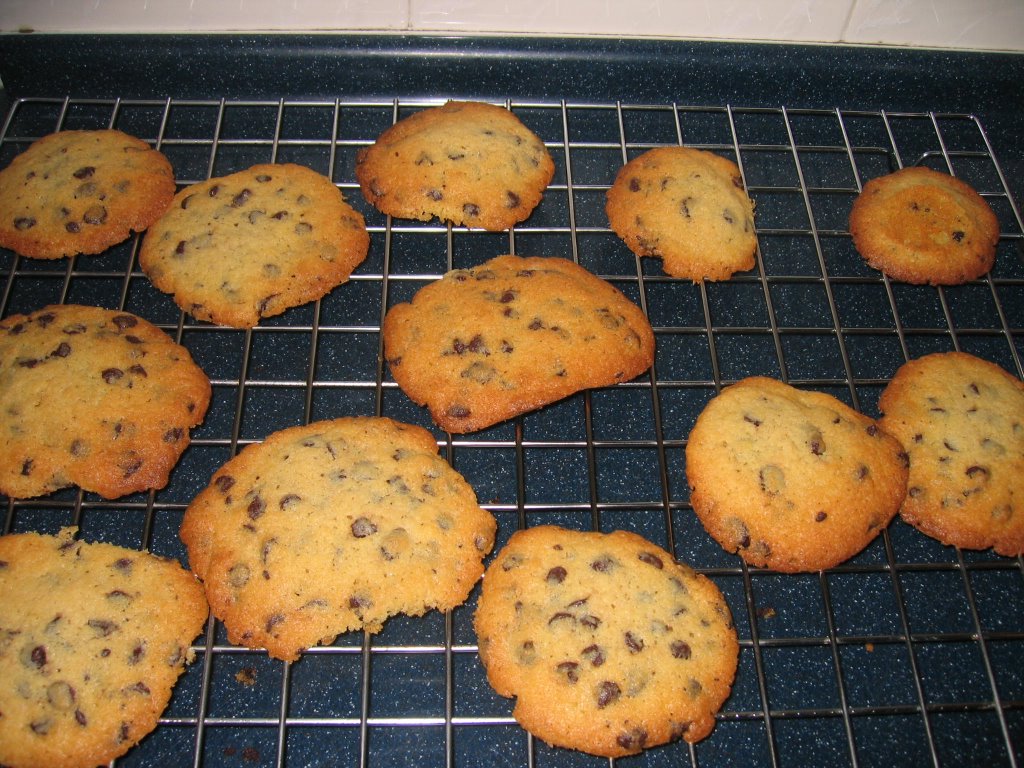
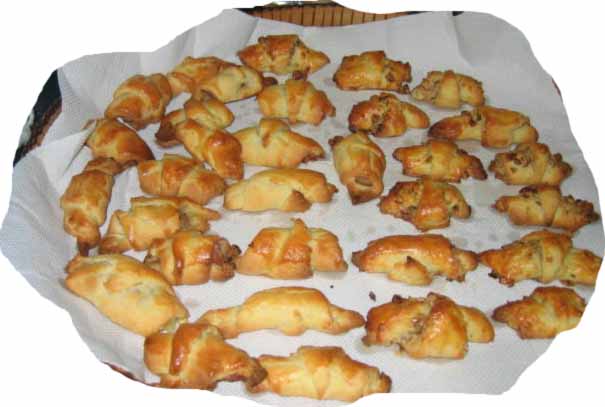
They may not look THAT appetising in the photographs, mainly coz my skill in rolling the dough into perfect crescents leave a lot to be desired, but taste wise, especially fresh from the oven, they are rather good.

The original recipe only gives the option for a sweet filling, but I took the liberty of making them half savoury, and half sweet.
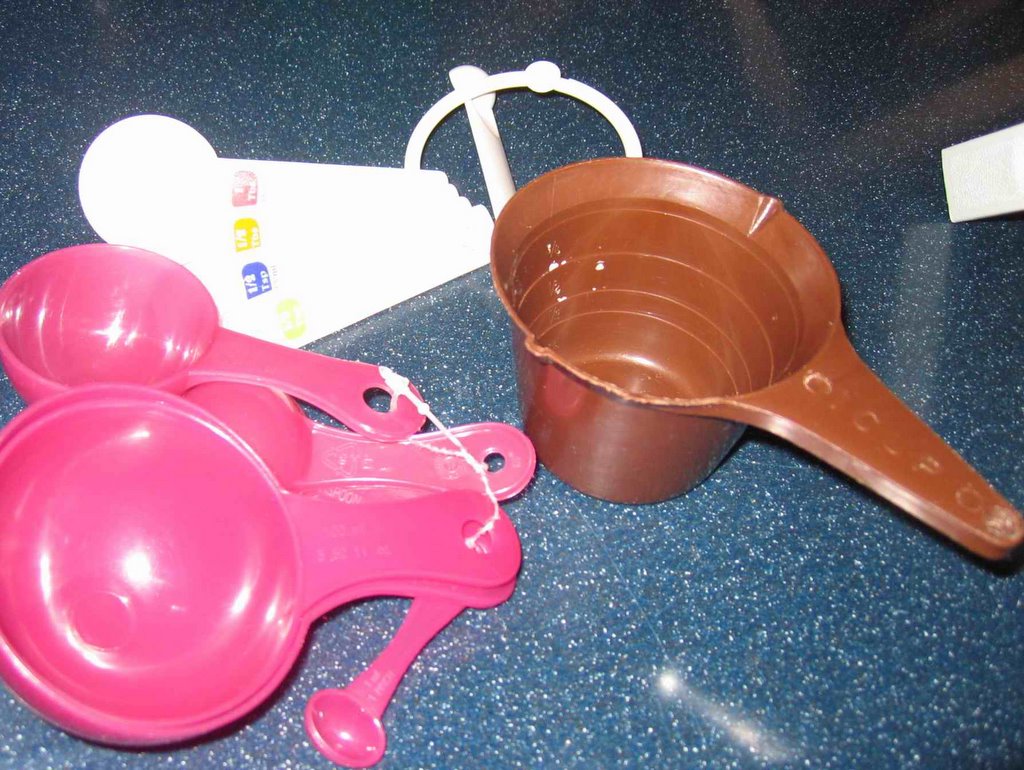
Stuff:

250 gm cream cheese
250 gm butter, softened but not melted (yup, that's half a kilo of artery clogging ingredients)
3 tablespoons caster sugar

2 ½ cups plain flour, sifted

Filling:
Sweet:
1 cup chopped walnuts
2 tablespoons brown sugar (mixed into the chopped walnuts)

Savoury:
Beef bacon, bacon, luncheon meat, corned beef, whatever tickles your fancy, I'd say.

How to make:

1. Cream the butter and cream cheese in a bowl (ie, use a cake mixer and beat on high speed), with the sugar, until light and creamy. The mixture should taste....like cheesecake.

2. Sift the flours into the bowl, and mix with a spatula, until it all comes together into a clingy (like those needy girlfriends, ie, clingy) dough. Sprinkle more flour if its too sticky. Knead slightly, and divide into two portions and refrigerate for at least 30 minutes. Some books say 2 hours.

3. Roll out one portion ato about 5mm thick, and cut it into a round shape, using a plate as your template. Ie, put the plate on the rolled dough, and cut a circle.
4. Divide the circle into 12 portions... the book says 16, but I think 12 is better. My fat fingers can't handle such dainty morsels.

5. Sprinkle the chopped (finely) walnut and sugar mixture onto the circle of dough. Roll from the wide end of the piece, so that it forms a mini croissant. If using savoury filling, follow the same procedure, but with your savoury filling.

6. Brush with egg and bake in a preheated oven at 190C until brown.

7. Careful when popping into the mouth. And try to limit yourself to two pieces max, or you will have to spend an hour on the treadmill, running at 9km/h.

Wednesday, January 18, 2006

Lemon Delicious Pudding


This is a fantastically simple tangy dessert for those who like sour stuff. If you like a hint of sourness, and not a full on attack of lemon on your palate, then increase the sugar a bit and reduce the lemon juice accordingly. The pudding magically separates into a layer of light sponge cakey thingie, and a layer of lovely lemon curd.

Stuff to put in:

3 eggs, separated

60gms butter
2/3 cup sugar

1/3 cup SELF RAISING flour

juice of two lemons
grated rind of the same two lemons

3/4 cup milk


1. Preheat oven to 180C, and grease a 1 liter bowl.

2. Beat the 3 egg whites until stiff, and soft peaks form. Apparently to test done ness, invert the bowl (for a couple of seconds only), and see if the egg white mixture stays intact. If it spills....shucks, you gotta start again. But you should have an idea if you start to tilt the bowl and the egg white mixture starts flowing!!!! Cannot be contaminated. Egg white is very sensitive.

3. In a separate bowl, beat the egg yolks, butter, rind and sugar until creamy.

4. Stir in the flour. Doesn't sound like a lot of flour, but don't worry.

5. Stir in the milk and lemon juice. Don't worry, contrary to popular belief, it doesn't curdle all that much. By now, your batter will resemble some watery yellowy mixture, which doesn't at all look like cake batter. DO NOT PANIC.

6. Though the recipe says fold in with metal spoon, I usually use a whisk for this. Whisk in the egg whites into the mixture.

7. Pour mixture into the prepared pudding bowl, and (this is a pain) place the bowl in another deep baking pan with boiling water, coming up to half way of the bowl. It's called bain marie or something.

8. Transfer whole thing into oven. Bake for 35 minutes until golden brown. Careful, hot hot hot.

Serve on its own, or with cream.....

Monday, January 16, 2006

Basic Terminology, Dedicated to Kung See Lai


I received these sms-es yesterday from a dear dear friend, and contrary to what she said, I wasn't laughing at her. I mean, a few years ago, I didn't know what these terms meant anyway, so today's post is dedicated to her, for daring to ask, without fear of reprisal and whatever else.

Question 1. Is Flour Self Raising Flour?
Ans : Well, self raising flour is one type of flour, but usually plain flour (unless otherwise specified) is plain flour. Self raising flour can be made from plain flour by adding 2 teaspoons of baking powder for every cup of plain flour.

Which brings us to the next question:

By layman's terms, the picture below IS a cup, and those spoons are table and teaspoons respectively.


These are measuring cups, and measuring spoons (pic below). A standard cup holds 250 fluid ml. I think a standard teaspoon holds 15ml. But I could be wrong. Oh, and a bit of juicy information. Unless you have a digital scale, if ever a recipe asks for 7gms of yeast, that's equivalent to 2 teaspoons.

You can even get the pink cups (its a combo of cups and spoons) in Ikea for next to nothing.


The one above is a measuring jug, which is pretty useful for various kinds of measurement. It even has the weight equivalent for sugar, flour, rice, etc.... so if some idiotic recipes ask for 200gms sugar, and you dont have a scale, presto, use the magic measuring jug.

This below is a whisk, and a sieve. There are various kinds of sieves, for sifting flour. Or is it called a sift. Whatever.


Other questions I've been getting recently and some I myself used to be confused by:
Almond meal = ground almond
Cream of Tartar = NOT tartare sauce for fish. it's a powder, like talcum that you put on a baby's ass. (though these days not advisable apparently). It's one of the components of baking powder. Is used to stabilise meringues, etc.
Baking Soda = Sodium Bicarbonate = Bicarbonate of Soda. It's like Tolkien referring to a particular character by myriad names. gandalf, mithrathir, whatever whatever.
Confectioner's Sugar = Icing sugar
Buttermilk = STILL DONNO what the heck it is....
Baking Powder is NOT baking soda.


Hope you have been enlightened.

Wednesday, January 11, 2006

Quickie Cookie


There's nothing quite so comforting as the smell of cookies in the oven, with the subtle aroma of vanilla, and butter wafting through the air. And that first bite into a warm, freshly baked cookie as it melts in your mouth. And that cup of warm milk, as you watch the snowflakes fall through frosted windows. The kids rush in, faces flushed from the snow burn, after building their snowman......

[wakes up from dream]

The kids rush in... after swimming, screaming, "we are hungryyyyyyyy", burnt from hours of exposure to ultra violet radiation. Bring out the ice milo....

Anyway, this is a great and fattening snack, especially if you have kids you want to fatten up, (like my niece and nephews).

Group A
140 gms butter, cold
2/3rd cup brown sugar
1 egg beaten
1 teaspoon vanilla essence

Dry ingredients
1½ cups flour
1/2 teaspoon baking soda
chocolate chips, according to how chocolatey you want it to be.


1. Preheat oven to 180C

2. Blitz Group A ingredients in a food processor, until well mixed. Transfer the glob to a mixing bowl.

3. Sift the flour and baking soda into the mixing bowl, and mix with a plastic spatula, until a cookie dough is formed. Chuck in the chocolate chips. Mix until well mixed, like a chap chong child.

4. Drop heaped teaspoons of dough onto baking tray, lined with baking paper. Bake for 10-12 minutes, until brown.

5. DO NOT PANIC, first time bakers, if your cookies are soft as toilet paper in the rain.... when you first take them out of the oven. I'm not sure what the chemical or biological process is, but when you transfer them to a wire rack, and let them cool, they harden. So they start off hot and soft, but eventually harden. Yup, like the male anatomy.

6. Eat with caution, because they probably are quite fattening. My guess is, one cookie = 10 minute jog on the treadmill, or 20 minutes body combat, or 10 minutes body attack. Feed liberally to skinny children, but do not let fat kids have more than one.

MAKES about 18.
Preparation time : 5 mins
Baking time : 10-12 mins.

Friday, January 06, 2006

Easy As Pie - Apple


I guess next to chocolate cake, one of the most politically correct desserts would be apple pie. It's like the chicken and fish equivalent for meats, most religions allow it, and most people eat it. Serve a cheese cake, and you get all the fussy eaters declining it, citing reasons from "sou" (Cantonese), to "lactose intolerance", to not liking the chilled variety, but liking only the baked variety, or vice versa.

So, apple pie. Quick, cheap(-er than cheese cake) and easy.

Pastry:

2½ cups flour, sifted
150gm butter
2/3rd cup icing sugar
1 egg beaten

Filling:

6-8 granny smiths (depending on size)
2 red apples (fuji, delicious, anything really)
3 tablespoons sugar
1-3 teaspoons cinnamon, depending on individual taste
Lemon peel from one lemon, OR
3/4 cup raisins
2 tablespoons apricot jam


1. Chuck in flour, icing sugar and chopped butter (cold) into food processor. Blitz until it looks like one material, ie, breadcrumbs, and you can't see any butter bits anymore. With the motor running, pour in the egg. After about 15 seconds, the dough should form into a lump, or ball, and start coming off the sides of the food processor bowl.

2. Scrape all the dough out, roll into a disc or ball, and refrigerate for 30 minutes or so.

3. Get your maid, if you have one, to skin and slice the apples. Slice the apple into 1/12ths. (ie, quarter, then 1/3rd each quarter. However, if you like large chunky apple pieces, then cut into 1/8ths.

4. Depending on whether you like your apples soft, or crunchy, cook them in a large pot, infusing it with the cinnamon and sugar. If you want them soft, cover the pot with a lid, and go read a magazine for 10 minutes. If you do not want the apples too soft, cook until the apples are tender, but are no where near disintegrating.

5. Drain, and chuck in the lemon peel, or raisins, and mix. Let cool slightly.

6. Roll out 3/5th of the pastry to line the base of 8" diameter pie tin. Spoon the apricot jam at the base. Fill the base with the apples. Roll out remaining pastry and cover. Brush with either beaten egg, or milk. Usually I use the latter, coz I wouldn't know what to do with remaining egg.

7. Bake in moderately hot (185C) oven for about 25-30 minutes, until nice and brown. If not worried about diabetes, sprinkle castor sugar over the top after removing from oven.

8. Serve with pouring custard, or fresh cream, or vanilla ice cream or with any of the three combinations.

Wednesday, January 04, 2006

Molten Lava Flourless Chocolate Cakes


Ingredients For Cakes:
180gm butter, 250 gm dark chocolate, 1 cup caster sugar - Group 1
1 cup almond meal (that's almond crushed to breadcrumbs like), 1 cup cocoa, 5 eggs- Group 2
optional for molten centres - 200 gm dark choc, 1/2 cup cream - Group C


Molten Centres
A day ahead, melt the group C ingredients in double boiler setup, (ie, bowl over pot of simmering water). Alternatively, just chuck everything in a glass bowl and zap in a microwave for 1 minute. Stir the chocolate mixture till mixed.

Refrigerate. When cool and pliable, shape into cubes or balls the size of cherries. large cherries. i just cube em. as in, i refrigerate them into a tray, and cut them into cubes about 2cmx2cmx2cm.

Cakes itself :
Sift cocoa and mix together with almond meal in a bowl.
Melt group 1 ingredients in a heavy pot, on low heat, until sugar, butter and chocolate have all melted into a glossy saucy yummy texture.
Pour the aforementioned chocolate sauce into the cocoa almond duet.
Whisk together to combine. Actually, this is good exercise for the arms, because the mixture gets a bit thick, and its like stirring glue, or dodol.
Add eggs one at a time. Continue whisking. Whisking may not be accurate. Stir (like a witch does to a cauldron) with a whisk, in a movement that is a combo of beating, and stirring.
After the 2nd egg, you'll be wondering, oh dear, have i got it wrong, coz the mixture will look all lumpy and dog-foody....but fear not, you are on the way to success. By the time your 5th egg goes in, the batter would be lovely and smooth, and can be scooped out with a 1/3rd cup, which you should then pour into a greased and floured muffin pan (the standard muffin size, not the obscene big ones that you get in developed countries, or coffee bean).

I think you should get about 15 nos. which is a bit of a pain, coz usually, muffin trays come in 12. you can either 1. lick up the rest of the batter, 2. just chuck the remainder into a small baking tin, 3. use another muffin tray.

Your oven should be preheated to about 140C, which is moderately low. After your batter has settled into the muffin pan, insert your frozen chocolate cherry or cube into the centres. Voila.

Baking time should be about 20 mins. Serve with fresh cream, or vanilla ice cream, or both, depending on your calorific allowance