Monday, July 31, 2006

Pie Are Square

Well, it's Friday night, you have to (well, not HAVE to out of compulsion, for there is no compulsion in religion, so, its HAVE TO out of lurve) whip up some semblance of supper for your cell group mates. I was feeling lazy this Friday, and I had a pack of Pampas Puff Pastry which I bought two weeks back, so what to do, what to do?

Not every thing has to be done from scratch, though there is no clear boundaries as to what constitutes "scratch". I mean, strictly speaking, we don't plant our own wheat and grind our own flour, or milk our own cows (though son did suggest once, "Papa, why don't we buy a cow?", "Why" I ask, "So that we can make our own cheese", he says). So, when people say, you made it from scratch, I ask, what do you mean scratch??? Is using ready made pampas puff pastry cheating? Actually, I reckon making puff pastry is too much effort. And not cheap either. Not with the price of butter these days anyway.

So, I stopped by at TMC on the way home, and bought a roast chicken, honey roasted, for RM6.99!!! And a bag of frozen vegetables, ie, peas, carrots and corn combo.

The wonderful thing about this is how quickly it is to assemble. I start at 8.20pm, bible study starts at 9.00pm.

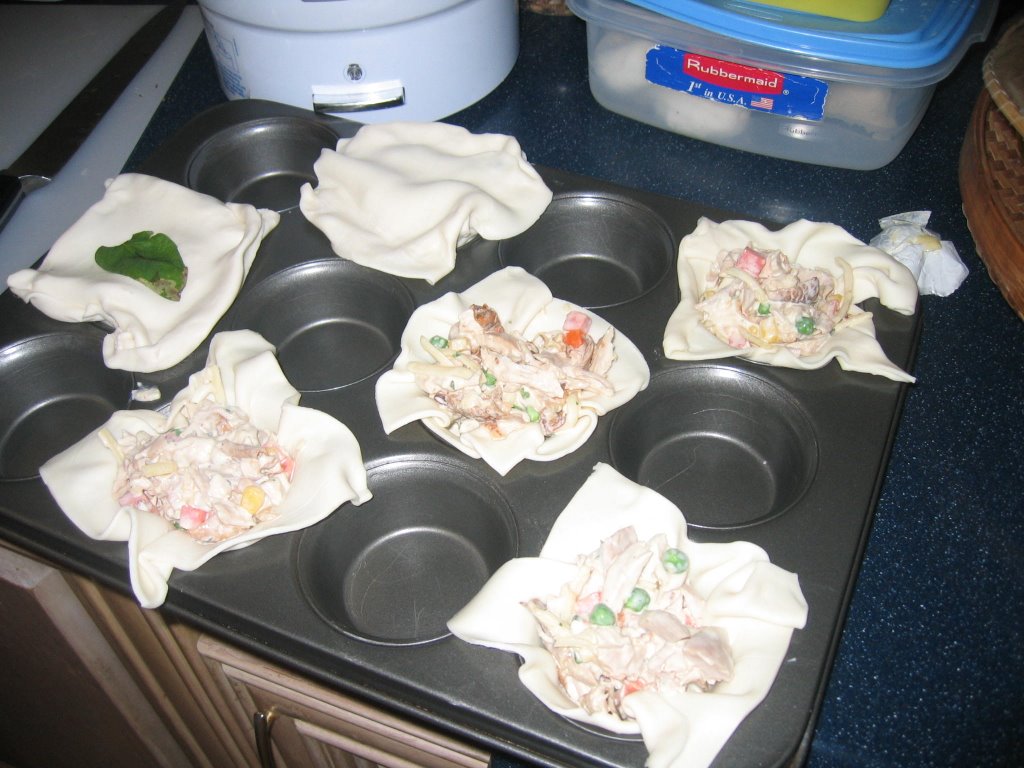
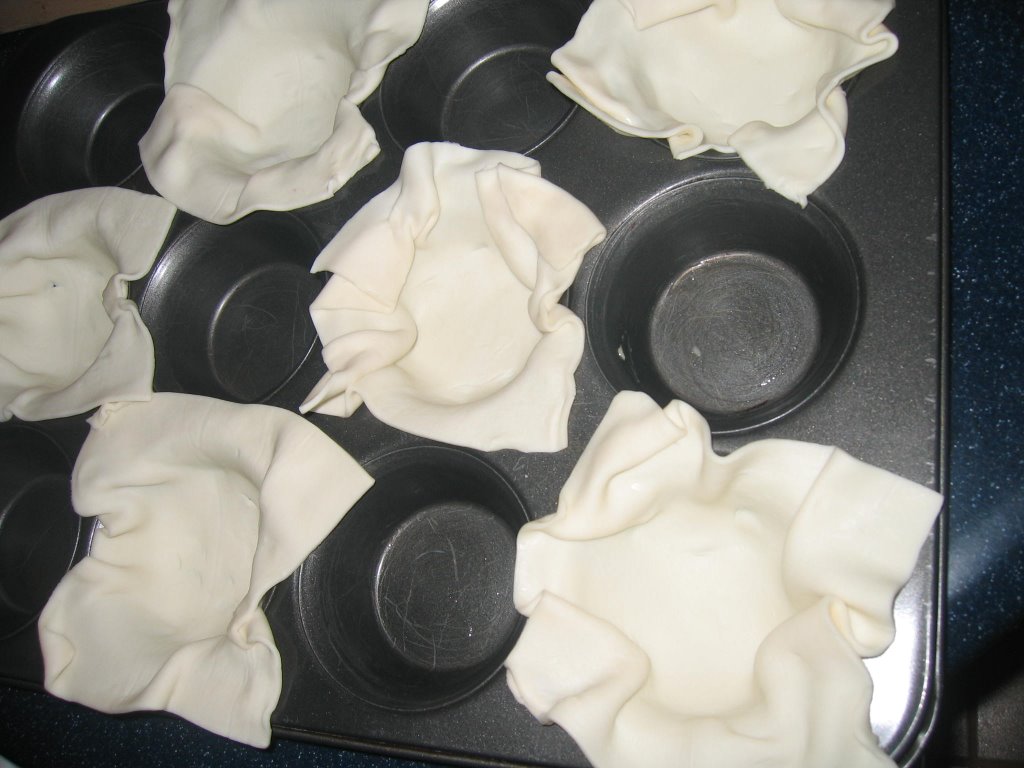
First, cut the pastry into squares, and put into a muffin tin, alternating pattern so they don't overlap. I can't be bothered to cut the pastries into rounds, and reroll the cut offs.


Shred the chicken, and add a cup or so of cream, frozen veggies, a handful of shredded cheddar, (or even those sliced kraft cheeses adds a nice taste), and for added flavour, one packet of Campbell's powdered mushroom soup, mixed in some water. Guess you could use a can too, but more expensive.


Fill the little pies. Funnily, one chicken fills exactly 12.... and a pack of 6 sheets, divided into 4 squares, yields 12 pies.

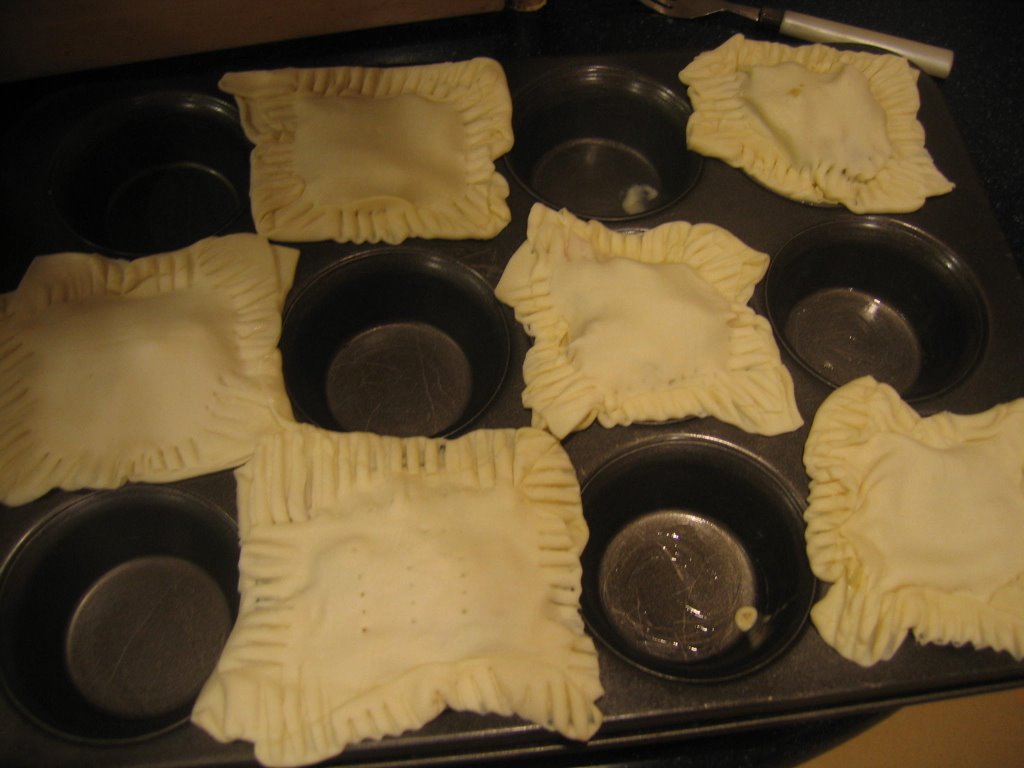
Cover with another square, and using a fork, press the top and bottom sheets together.

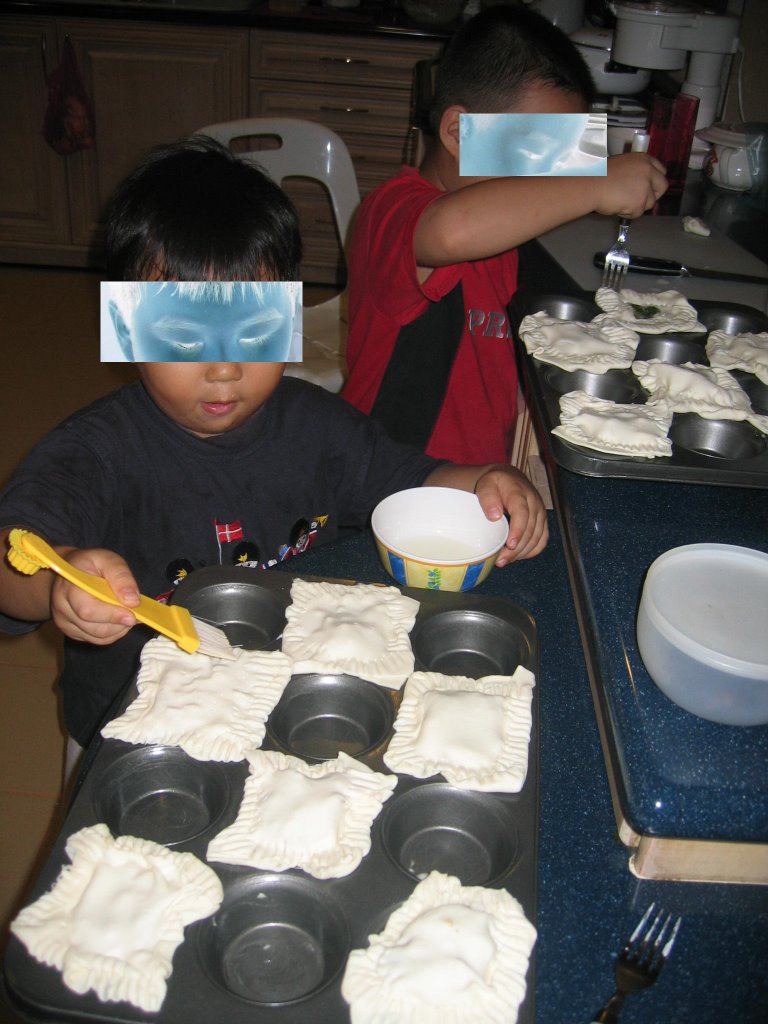
Employ slave/child labour to glaze the top of the pies, with either milk or egg, or both.

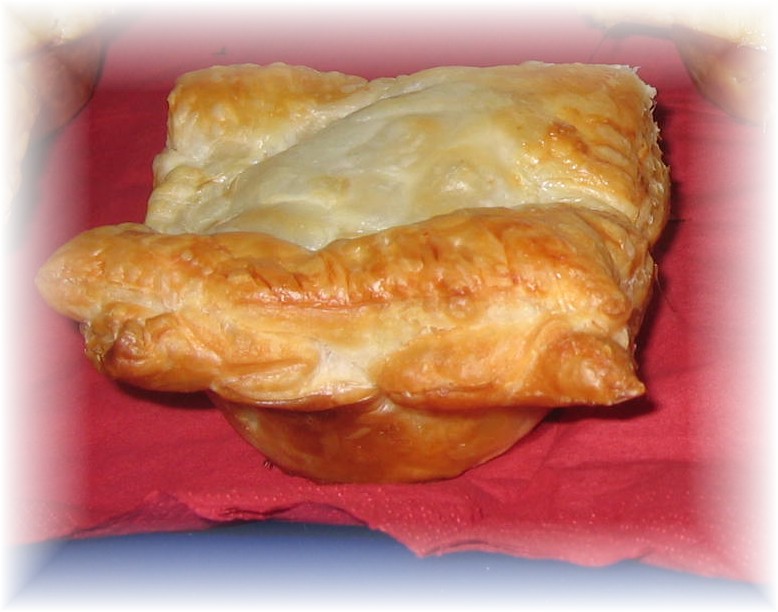
Bake in 180C or 190C oven until brown.


And VOILA, freshly baked pies, which are square, hence PIE ARE SQUARE!!!

Saturday, July 29, 2006

Tiramisu Cake


This baked version of tiramisu is a lot more work than the version where you used ready made savioardi sponge fingers, unless you're making the sponge fingers yourself. For this version, you need 3 main components, the coffee chiffon cake, the filling, and the caramelised nuts. I got this coffee chiffon recipe from Alex Goh's Creative Cakes. Altered somewhat, to avoid copyright infringement. In any case, with recipes, I wonder who does one really define copyright.

Coffee Chiffon
Group 1
4 egg yolks
2 tbspn coffee powder
115 ml water
85 ml vegetable oil
3/4 cup sugar
1 ½ cups flour
1 tsp baking powder

Group 2
4 egg whites
1/2 cup sugar
1/8 tspn cream of tartar

1. Mix the group 1 ingredients until all properly mixed.

2. In separate bowl, whisk the egg whites until soft peaks appear and gradually add in sugar and cream of tartar.

3. With a light hand, mix the two groups of ingredients until well combined, pour into a 8" round pan, sides UNgreased, and bake at 175C for 40 minutes. Apparently chiffon needs to climb up the sides of the pan, hence no need to grease. (no need to use the chiffon pan)

4. When cake is done, invert and let cool, as one usually does with chiffon. Remove from pan after the cake has cooled.

5. Split cooled cake into 3 horizontal layers.


Filling:
250gm mascarporne, but if you are feeling generous, then 500gm.
4 egg yolks
1/2 cup castor sugar
2 cups cream, whipped till fairly thick.
Kahlua or Marsala wine - to taste

1. Beat the egg yolks with the sugar, until pale and creamy.

2. Add in the mascarporne and stir until combined, and all lumps removed. It should be a creamy texture. Add the kahlua. I usually chuck in about 6 tablespoons, that's why, cannot sell commercially. Too expensive.

3. Mix together with the whipped cream.

4. Chill mixture.

Coffee & Kahlua Mixture

Usually, I put 2 tablespoons coffee, into 3/4 cup water. Very concentrated. And also embellished with another 4-6 table spoons kahlua. This is to be brushed over the cake to make it nice coffee-ish moist.

Caramelised Nuts

1 cup sugar
50gms butter
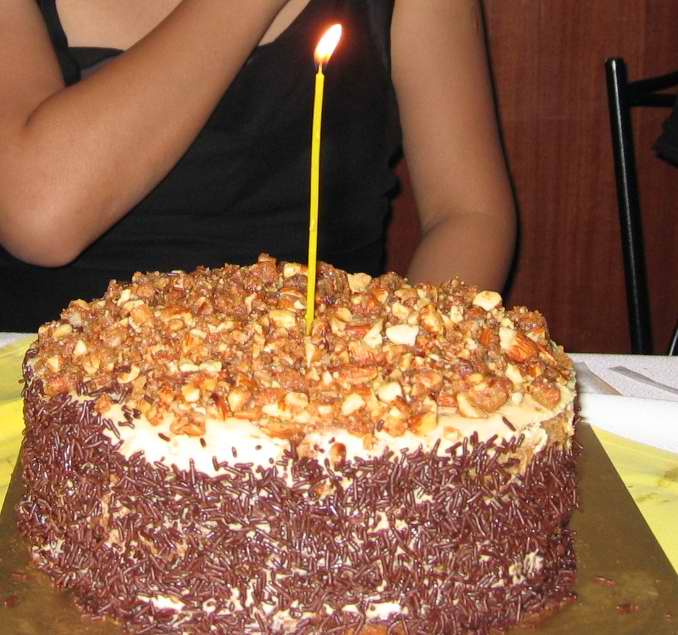
1 cup chopped almonds (chopped coarsely as per picture)

1. Melt the sugar and the butter, until it turns a beautiful golden, caramelly thick liquid.
2. Stir in the nuts, and quickly lay out onto a tray lined with baking paper. Let cool, and when it has cooled, crush it either with a mortar, or food processor, or whatever heavy object you have. With mortar, just put into plastic bag and pound.
3. Set aside

Putting together the cake.

1. Brush the bottom layer of cake with the coffee mixture. Don't drown it. It should be just enough to make it moist, with disintergrating the whole thing in coffee.
2. Pour 1/4 of the mascarporne filling. Sprinkle chocolate chips or chocolate pieces evenly over the layer of mascarporne.
3. Repeat with another layer, but no need for more chocolate, unless it is your desire.
4. After finishing with top layer, sprinkle the caramelized nuts over the cake, and on the sides, if you wish. I put chocolate rice around mine, coz I didn't have enought caramelized nuts.
5. Refrigerate for at least 6 hours

Tip:
1. I put back the cake, when layering, into the 8" pan with removable base. This way, it's in a mold, and won't flop about, as the mascarporne cream isn't really very "thick"

2. You might want to add the element of gelatine, as recommended by some books. I personally loathe the idea of putting gelatine into tiramisu, but I suspect that is how the cake holds its shape for long distance travel. This recipe is fine, if you are serving it right from the fridge to the mouth, but if you need it to stand around for awhile, it'll melt really fast, as the ingredients are pure.

Gelatine: 1½ tablespoons to 40 ml water. Go try and see, and let me know.
Friday, July 28, 2006

Tiramisu, Cake Version


Stay tuned, for my experimental recipe of this cake version (okay, it's somewhat inspired by the Alexis and Su Chan versions, but is also available partially in the Australian Women's Weekly).
Eat your heart out, Jackson Kah.

Wednesday, July 26, 2006

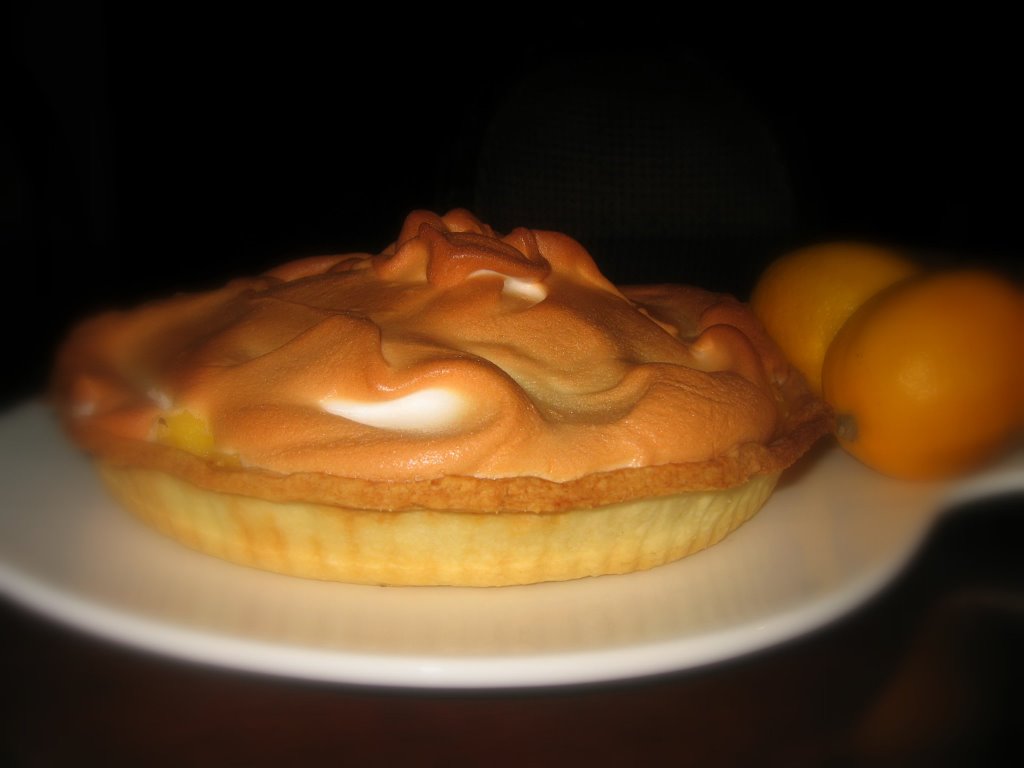
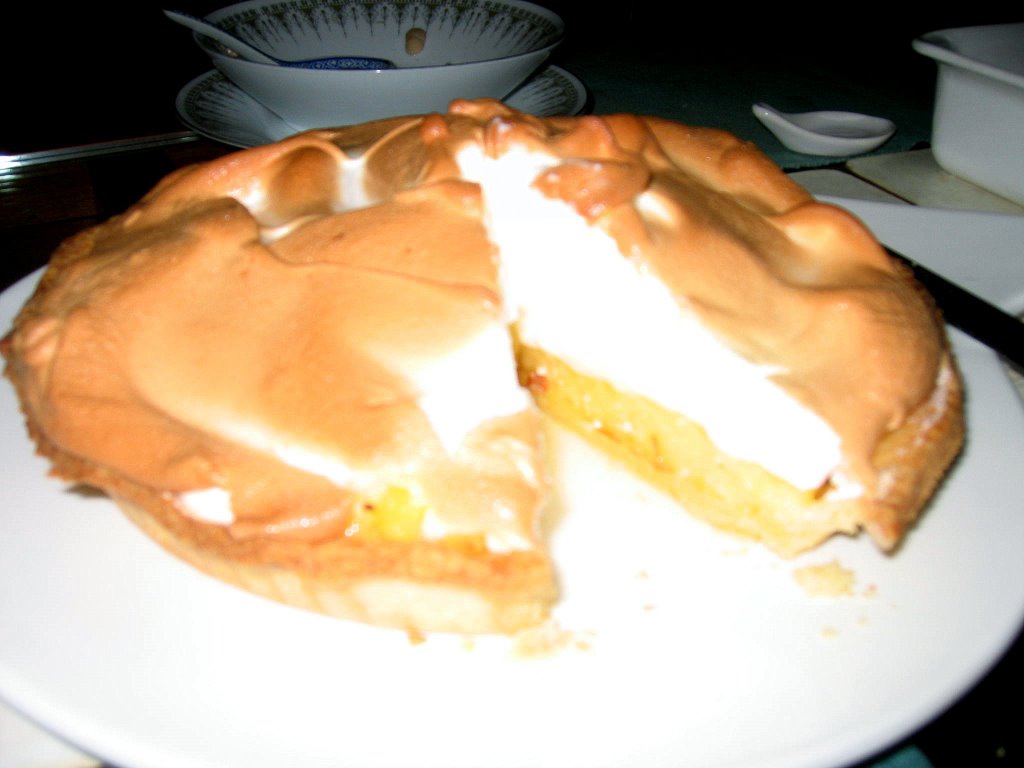
Son's Favourite Lemon Meringue Pie


Another dessert that falls into the very niche category, coz if you don't like the sour taste of life, then this certainly is NOT the dessert for you. Also, for reasons I can't fathom, the calorific content in this seemingly "healthy" dessert, is shocking. I think it's about 500 kcal per slice, according to the Australian Women's Weekly Cookbook.

There are so many recipes to choose from, eventually, I've just settled on a composite of several different recipes, for the pastry, as well as the filling and meringue.

Pastry :

125gm butter
2 tablespoons castor sugar
2 cups flour
cold ice water, about 2-3 tablespoons

1. Blitz the above (without the water) in a food processor. If don't have food processor, then tough luck, you gotta rub the butter into the flour and sugar, until it resembles breadcrumbs. Keep your fingers cool, (I don't know how, maybe intermittently put them in the freezer), and when it resembles breadcrumbs, (both manually or food processor), add the ice water, little by little until if forms a nice cohesive dough that looks like it can be easily rolled.

2. Refrigerate for 30 minutes.

3. Meanwhile, prepare the filling and also preheat oven to 180C

Filling:

Group 1
1/2 cup corn flour
1 cup water
3/4 cup lemon juice
1/2 cup - 3/4 cup castor sugar (depending on your sourness tolerance)

Group 2
grated rind of two lemons
60 gms butter
3 yolks

4. Mix the group 1 ingredients in a saucepan, or pot, over moderately high heat, until the mixture become thick and glossy. It should look like yellowy transparent play dough.... well, maybe not THAT thick....yellowy transparent err.... jelly like.... oh well, you'll learn through trial and error.

5. Lower the heat, and leave it on while stirring vigorously, for another minute.

6. Remove from heat, and add in the group 2 ingredients, and stir until all combined. You should get a lovely yellow lemony curd, the texture of thick custard. Lovely to eat on its own. Leave aside to cool.

7. Meanwhile, blind bake the pastry shell, in a flan or pie tin.

8. When tart shell is ready, put in the lemon curd filling, and whack on the meringue on top, and bake for another 10 minutes, until meringue is nice and brown.

Meringue:
4-5 egg whites, absolutely unpolluted
pinch of cream of tartar
1/2 cup castor sugar

Beat the egg whites until soft peaks form, gradually add tartar and sugar. The way to test if your egg white is sufficiently beaten is, if you invert the bowl, the mixture doesn't spill. Of course, don't invert too long, just quickly to test if the egg whites stay in the bowl, defying gravity.

I think this is good enough to be served without any embellishments.

Monday, July 24, 2006

Durian Season Is Upon Us Again


Posted the recipe before, but for lack of anything new to post, and also, for the newer readers who might not have seen this before, made my "signature" durian poppy seed cake for friend's birthday last saturday. The recipe has been posted earlier, here, but as I said....nothing new to post.

The stuff on top of the cake is just pure durian, as I found this species that I bought so creamy as it is, it wasnt necessary to add whipped cream. It was a hit, as usual. Ahem.

Monday, July 17, 2006

Godma's Banana Loaf

This has to be one of the easiest and rather yummy loaves to put together. Recipe courtesy of "godma" Pat. Better copy it quickly, for I haven't gotten her permission to post this, and if she objects, off it goes.


Mix together
2 eggs
1 cup sugar or less
1 cup oil

1½ cups high protein flour sifted
pinch salt
1½ tsp baking powder
1 tsp baking soda

5 large ripe bananas or more, mashed
raisins soaked in liquor, or in my case, 10 prunes soaked in rum, plus handful of raisins
chopped handful walnuts, or replace with pistachios, as some people (like my evil twin) find walnuts too bitter.

Literally just mix all the ingredients together. A kid could do this, and my 3½ year old did just that.

Pour into loaf pan, lined and bake at 170C for 50 minutes.

Delicious on its own, sinful with butter or fresh cream.

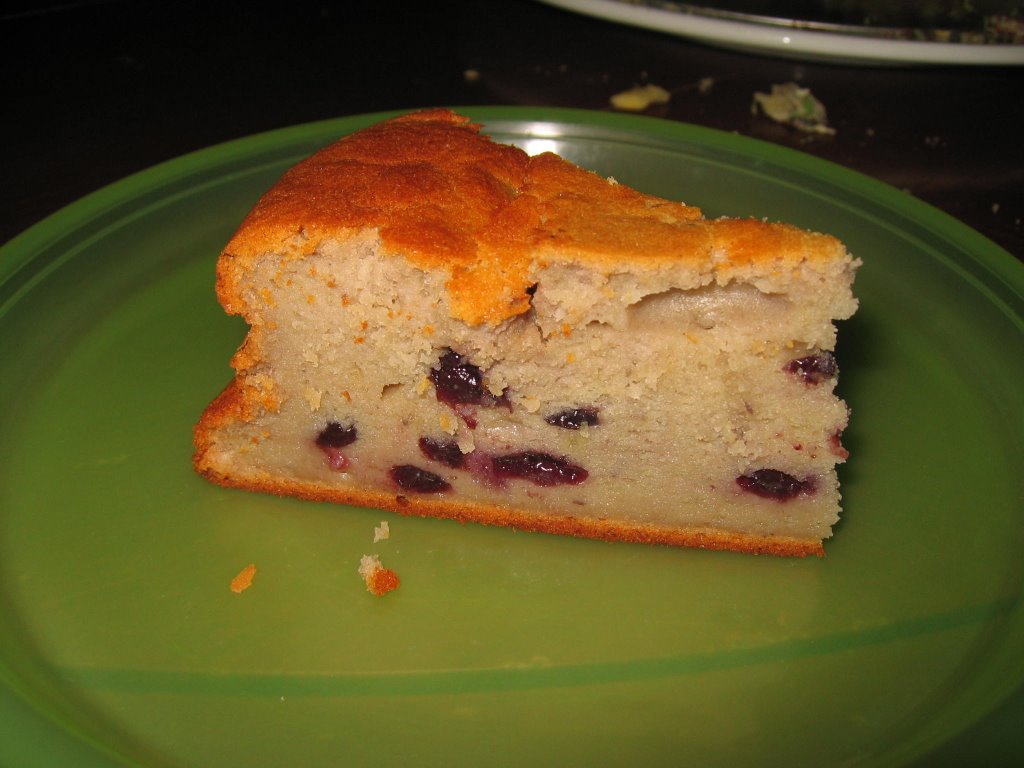
Allan's Sour Cream Blueberry Cake, and Other Stuff

Allan's Blueberry Sourcream Cake

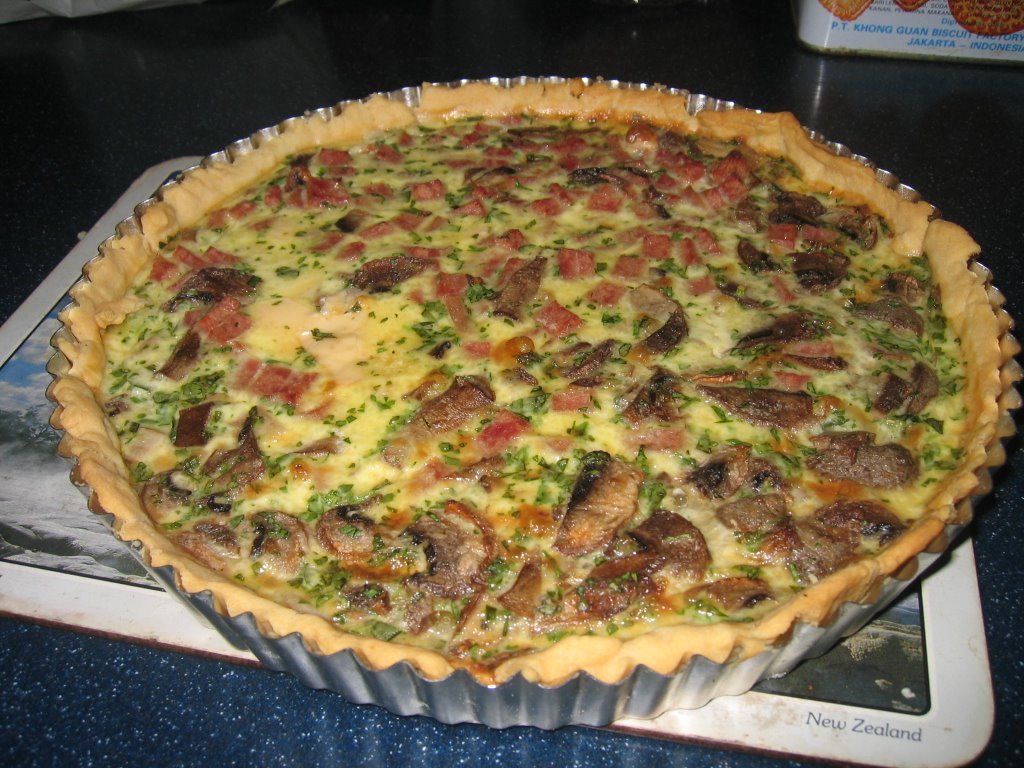
Ham, Basil, Coriander & Mushroom Quiche

Friday Night, Bible Study Night. What to make, what to make, for man does not live by bread alone.

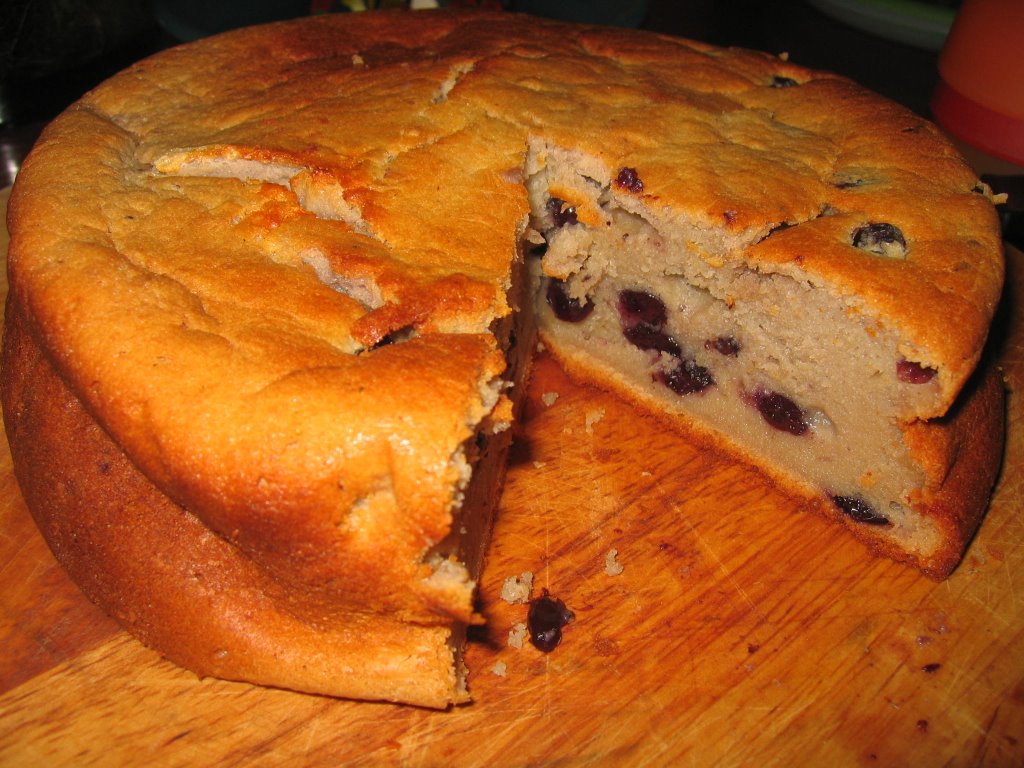
A friend of mine, from Singapore, who is also a semi professional baker, and caterer, (check out his website, allanbakes.com), very kindly gave me his recipe for a blueberry sour cream cake. Alas, I am not at liberty to publish it here, since it's his recipe, but he might oblige you if you went to his website and contacted him directly.

The cake turned out quite well, and was aptly described by Allan as a sponge but damp. I wasn't sure what the texture was meant to be, so I was relieved to find out that it was indeed a damp sponge. As I had reduced the sugar dramatically, I wasn't sure if the blueberry taste would overpower all else. I personally liked it, and thought it was nice especially when warm and freshly baked.

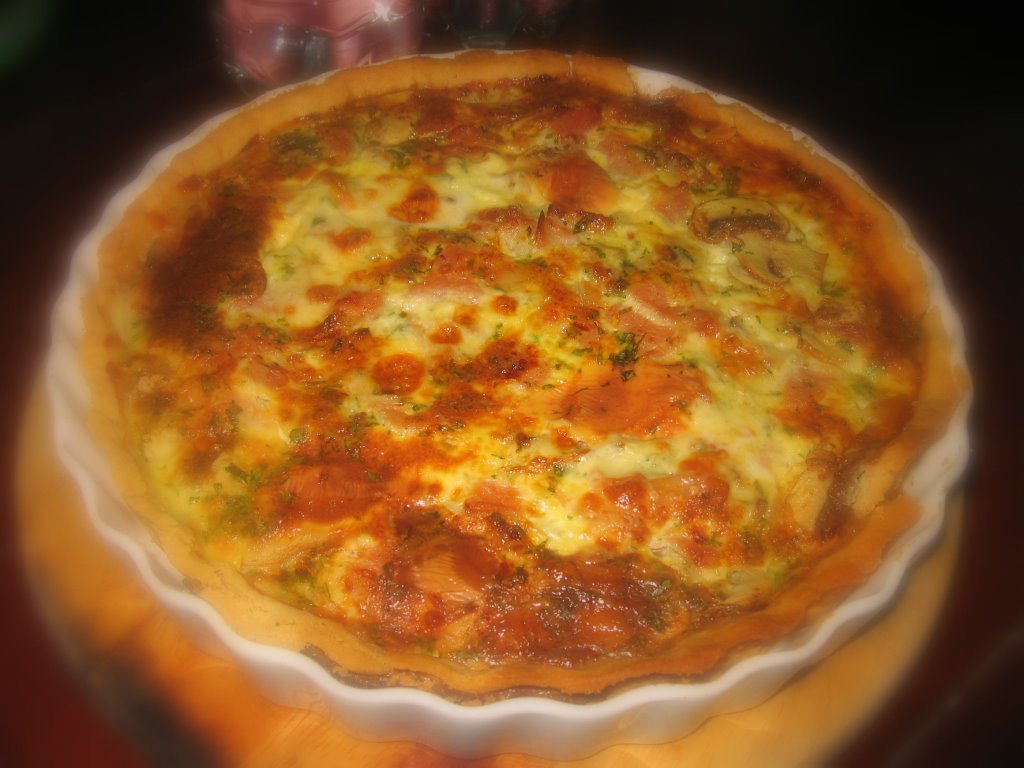
To complement the sweet cake, I also prepared a Ham, Basil (Homegrown by boy no 1), Coriander and Mushroom Quiche. If you want the quiche recipe, it's been posted here before. Quiches, like pizzas, are a blank canvass, with endless possibilities for the artist. For this particular filling, I used 3 thick slices sandwich ham, sliced into cubes, a handful of coriander, chopped finely, 7-10 basil leaves, chopped, two large button mushroom, finely sliced, 3 eggs, 1 cup cream, a slice of cheddar cheese roughly torn up and chucked in. Stir all the ingredients together and bake in the prebaked pastry shell (see recipe), in 180C oven for about 20-25 minutes till set. If you have the time, add in a whole chopped sauteed onion as well, it would go very well.


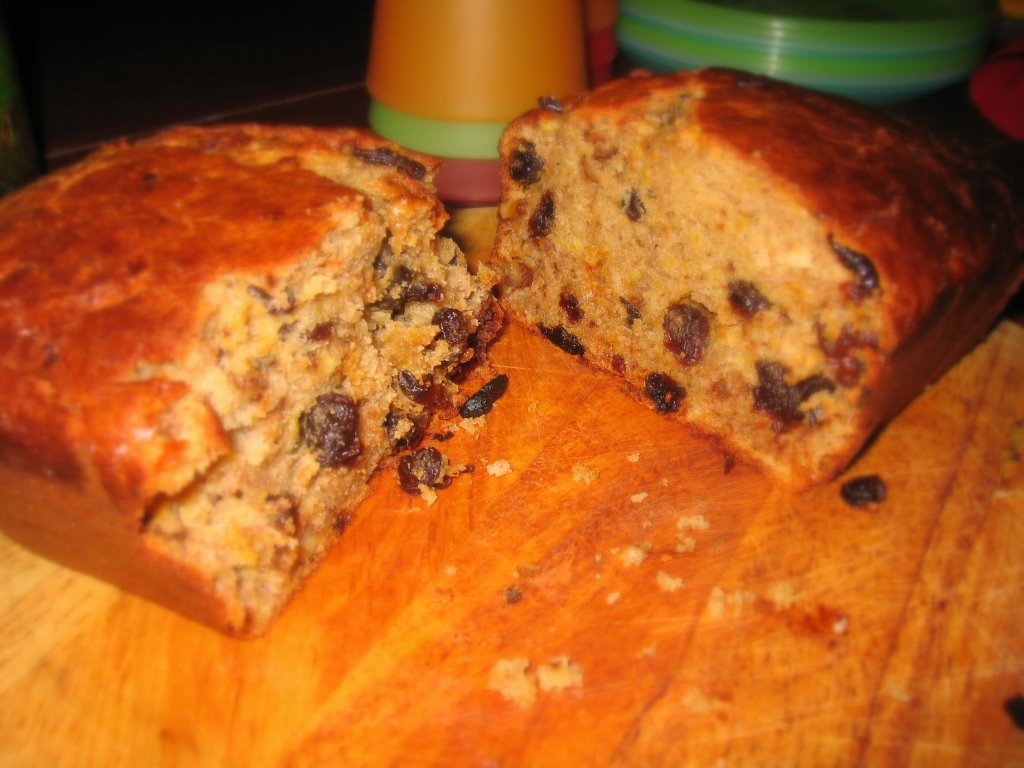
Banana Loaf With Raisins, Prunes and Walnuts

I forgot to blog about this banana loaf that I made two weeks ago, a recipe given to me by "godma". Very VERY easy to make, and rather good to eat, especially when warm. Contains no butter, just vegetable oil, prunes soaked in rum, raisins, walnuts, bananas, and high protein flour. Let me know if you want the recipe.

Wednesday, June 28, 2006

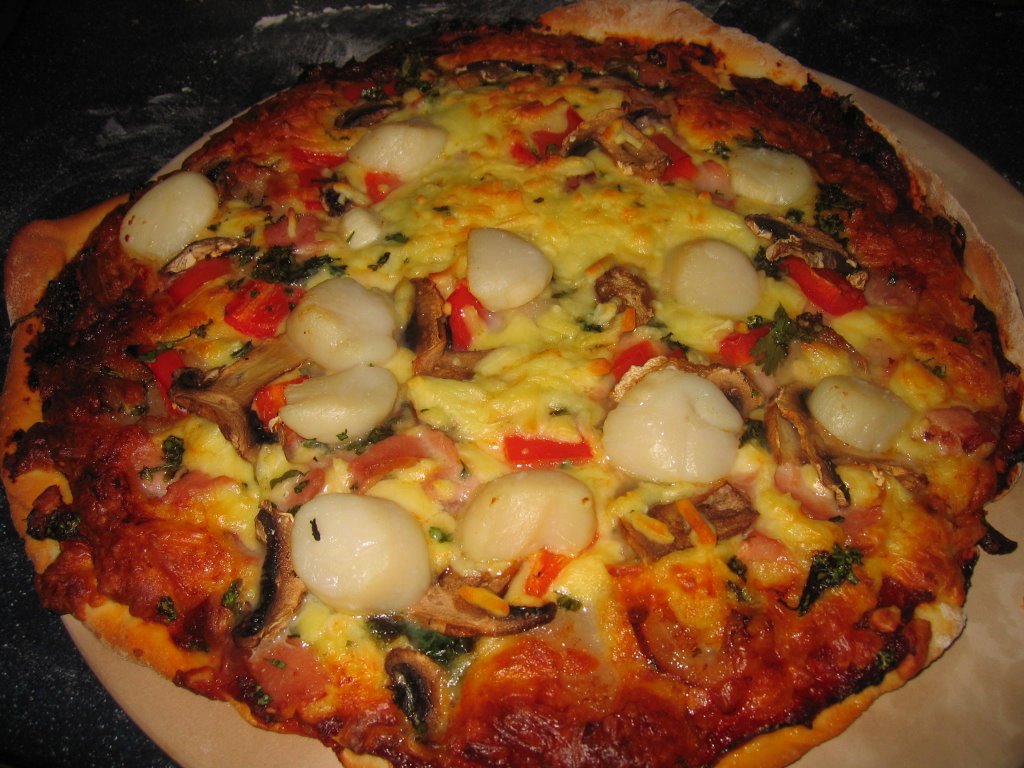
Homemade Pizzas


The ability to make your own pizza, from scratch, is the culinary equivalent of getting your driver's license. It opens up a whole new world, hitherto unexplored, and endless possibilities. And instead of confining yourself to the familiar, you can now experiment and create....

Of course, as with everything, the most important thing is foundation, or in this case, the base. I personally don't know how or why anyone likes those bready pan pizza bases, where you get full on flour. I love thin crusted pizza, where the carbohydrate acts as a subtle complement to the variety of fillings that lie above it....not encompassing your entire stomach space the minute you take a bite.

After a few years of dabbling with the base, I find the easiest one to be from the women's weekly book, which more or less works this way:

2 cups flour
2 teaspoons dry yeast (took me long time to find out 7gms is 2 teaspoons)
3/4 cup warm water
1 teaspoon sugar
two tablespoons olive oil
pinch of salt (optional)

Mix the sugar, yeast and warm water. Stir until dissolved.

Drizzle the olive oil onto the flour. With the salt. Pour in the yeast solution. (nope, no need to wait for it to froth).

Bring together until it forms a nice kneadable dough. Add some flour if too wet.

Now, for some reason, it makes little difference to a thin crust pizza, if you let it prove (rise) or not. You can use this dough instantly, and to me, it tastes and feels the same. If you let it rise, just whack it back into shape.

This quantity is enough for 2 pizza bases.

Toppings:

Really, this is where you are the captain of your ship, master of your fate, holder of your destiny, charter of your stars.

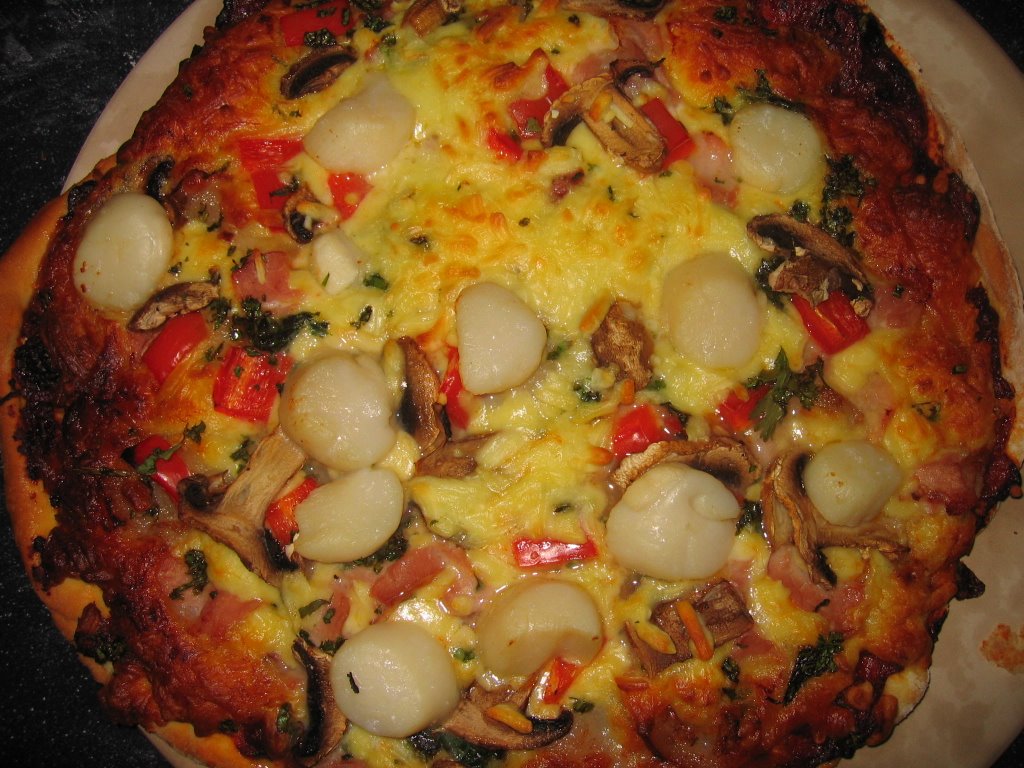
You can put virtually anything you want on your own pizzas. I love a pesto base, (as opposed to the tomato based ones). Spread the pesto base (about 2 heaped tablespoons) over the base. Sprinkle about 250gm of mozarella cheese or a composite of mozarella and grated cheddar. Plonk on your toppings. I love bacon and scallops, with mushrooms, peppers and some chopped coriander. Can't get bacon pizzas in this country very readily. And of course, no restaurant will give you the amount of scallops I've chucked onto mine.

Sprinkle some parmesan over it if you want....bake at 180-200C for about 20 minutes. And tuck into mouth watering goodness that's not from a hut.

PS- Just a tip, when using fresh seafood, like scallops and prawns I find they emit too much liquid if plonked on raw. So, best to precook it a bit, to drain the liquids, and place it onto the pizzas midway baking.

Monday, June 26, 2006

So Thus Came the Bride

[Continuation from Previous Post...]

On Friday morning, I had planned my schedule as such; I would rush home from work slightly earlier, chuck on the glazed fruits decoration, and get the cake delivered to the hotel, and go out and PARTY, having gotten that big load of my shoulders. To my HORROR, the hotel was VERY uncooperative about the whole thing, and this woman just nonchalantly said, "the wedding is tomorrow, so you'll have to deliver it tomorrow. We have no place to store it". And just like that, my social plans for the night were thrown into disarray. The problem with "tomorrow" is, I had to be there to support the groom at the cheep sun leong, (bargaining for bride), etc, etc. And, since the final touches of the cake involve fresh fruit, albeit glazed, I couldn't do it the on Friday night and leave it out unrefrigerated. Cursing under my breathe, I made the necessary sacrifices at the social functions I was at on Friday, to wake up at 7am on Saturday, to quickly plonk on the decoration.

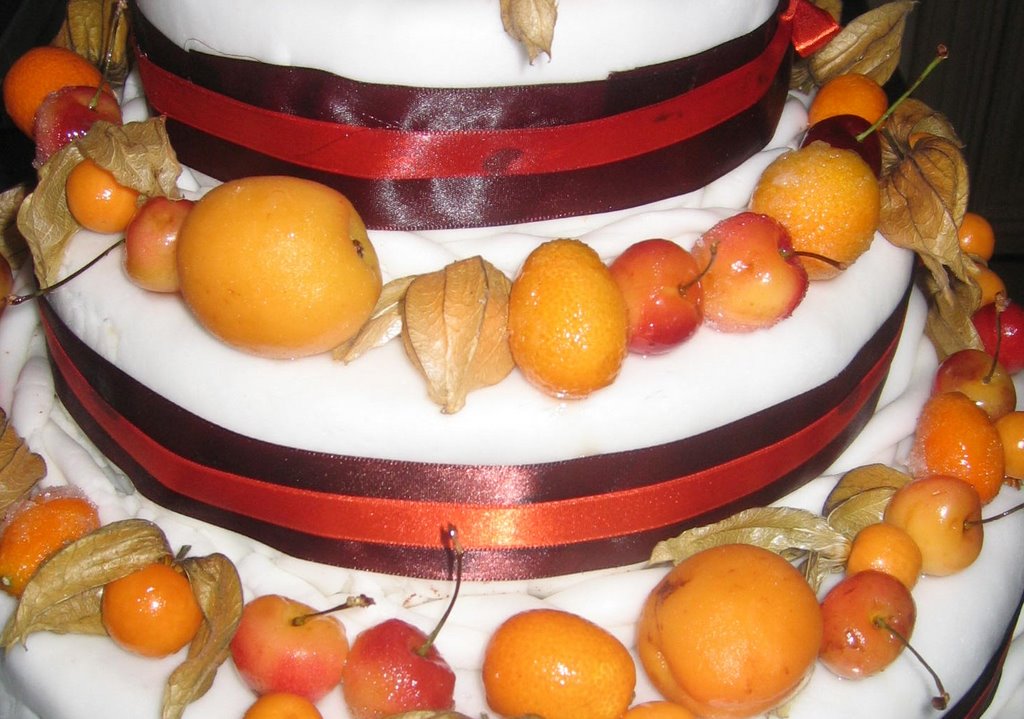
The bride's theme was autumnal colors, and wanted orangey colored fruits, which are actually summer fruit.... so, using a medley of physalis, (cape gooseberries), kumquats, apricots, yellow cherries, red cherries, ...and some standby strawberries, which weren't used in the end. Oh, I had also bought some sugarpaste orange color roses, just as backup, which I didnt use, so if anyone wants about 10 rose buds of various sizes, please let me know, you can have them FOC.
Anyway, by 7.45, and 3 dozen toothpicks later, I managed to put the finishing touches, and headed off for the fun and games at the cheep sun leong, which is another story altogether.


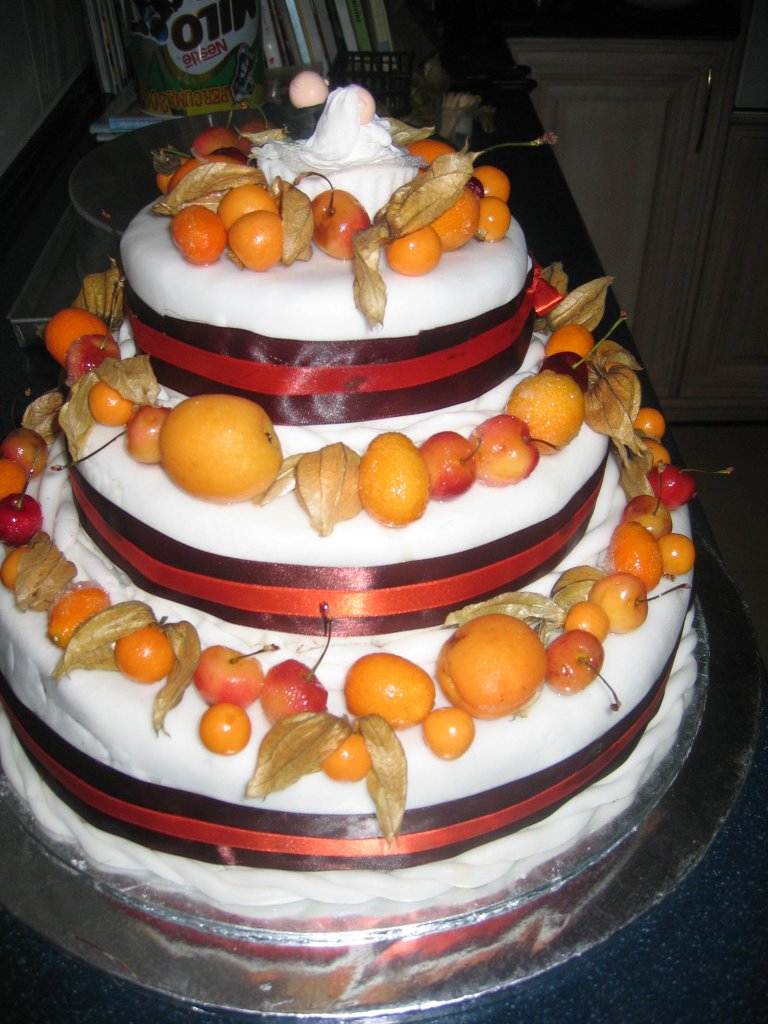
Summer Fruit in Autumnal Colors... Glazed with apricot jam and castor sugar.

The finished product. A bit too late to rectify the cracking fondant,
and the lop sidedness.


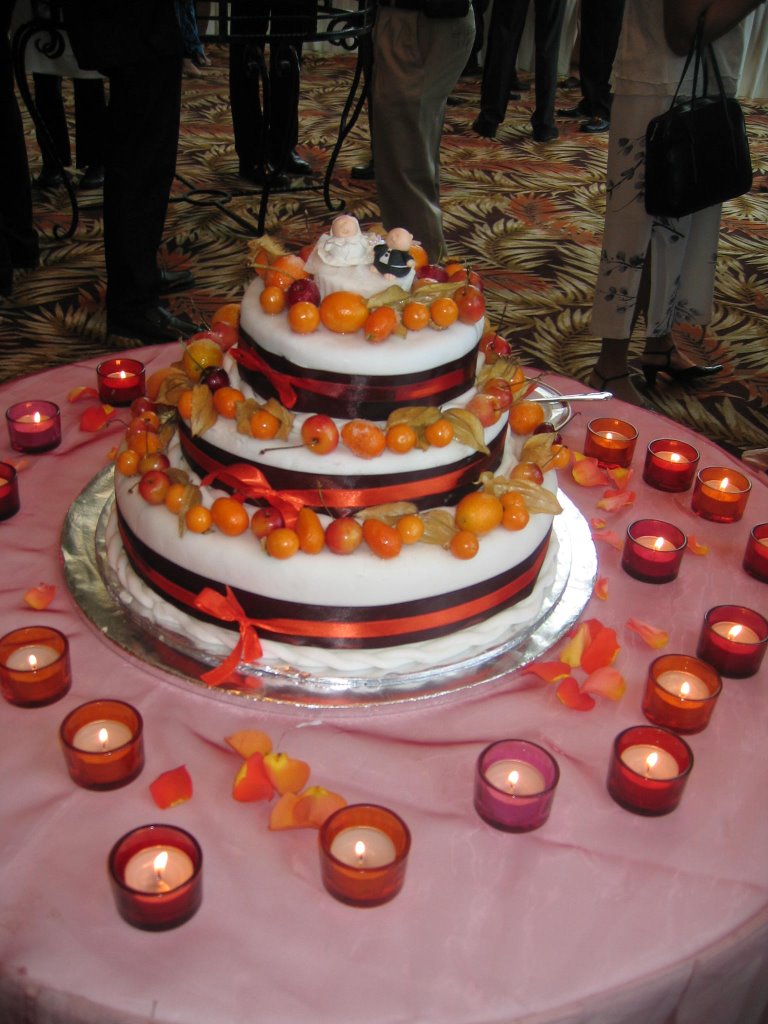
Anyway, when we subsquently arrived at the hotel, (the actual wedding commentary will be on the other blog), I was expecting to see the cake on a raised dais, on stage, far away from public scrutiny, BUT TO MY HORROR, it was placed on an eye level table,
where the cocktails were being served. That meant it was subject to close scrutiny.....but I suppose being predominantly people from our church, the scathing remarks were scarce.... but somehow or other, word LEAKED that it was me who made it. Then of course, the next reaction was disbelief...."Huh? Is there another Fatboy in FBC? (First baptist church)....Cannnot be the one who's father of four kids"....And like how Malaysians flock to an accident scene, all of a sudden, there was a crowd hovering around the cake, which was when I made my quick exit.

Epilogue : I missed the cake cutting!!!! ARGH!!! I didn't hear the announcement, and was milling around the other end of the foyer, chit chatting. Got there on time for the bride to give me a thumbs up. As expected, the vanilla butter cake was okay, and some even had nice words....but the chocolate butter cake, (1st and 2nd floor), was a tad dry....what surprised me was, the fondant actually tastes quite nice. Sickly sweet of course, but reminds me of my childhood. Anyway, BRIDE AND GROOM, when and if you read this, I take this opportunity to thank you for having so much faith in me, and it has been, in retrospect, something REALLY blogworthy, and an experience that I will remember and cherish for years to come. God bless you both.

Friday, June 23, 2006

Here Comes The Bride....Part 3

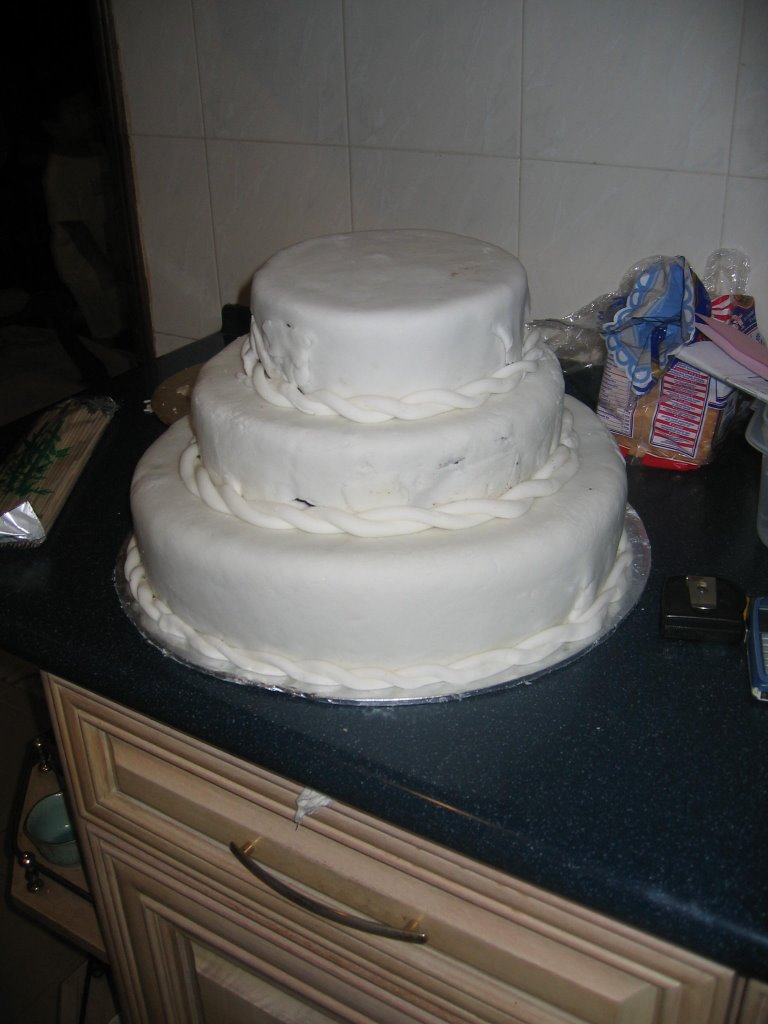
The entire experience is almost enough to make me want to hang up my oven mitts. Rolling out the fondant icing, especially for the 14" dia cake, was a mammoth task. I could feel my shoulders falling out, worse than the Shoulder Track during Body Pump in the gym. It got worse, not better, because I had made the fondant in batches, and some were more pliable than others.

It was like an on the job training experience. I've never done it before, and in all the cookbooks, the largest diameter cake is 12", with no reference to anything larger. I guess it might qualify as industrial size. Anyway, I even had to telephone my other half to ask if it was coming home anytime soon, as I needed help to lift the 28"diameter piece of fondant onto the cake without making a huge mess. Alas, it was nowhere near home, so I had to do it myself. It was a mess.

The process continued, and I thought it should get easier with the smaller cakes, BUT NO....it got worse, because of the s****** fondant icing. I had used the most pliable batch for the big cake, so now was left huffing and puffing trying to role out the balance which was a lot harder.

Now, a friend in Singapore had warned me that when stacking, to make sure I got it centred. As in concentrically aligned. I pooh pooh-ed him, and said, excuse me, I am a Civil Engineer, and have built precision buildings before, I think I can stack a cake accurately. Boy, was I wrong. For one, I didn't have all the canggih surveying equipment with me, like a theodolite, and what have you. Secondly, I thought, heck, this is not the twin towers, that needs just precision, to link a sky bridge between the two. So what the heck, I just plonked in some skewers as markers, and plonked on the layers. Now, if you look carefully, the top layer is a bit off centre. But (boy, talk about imperfectionist), I figured, ah, well, when it's decorated, and on stage, I doubt people will actually go closely to inspect. This lackadaisical work ethic....is basically what made me almost always fail my university exams.

As you can see, the imperfections are quite obvious. Dents in the fondant, etc etc.... but having said that, I am CONFIDENT I will be able to pull off a fondant iced cake next time without much problem. (if I haven't hung up my mitts, AND, for cakes of NORMAL size only). The perimeter edges of the base also were a bit dodgy, hence the idea to put a piece of braided rope around the perimeter.

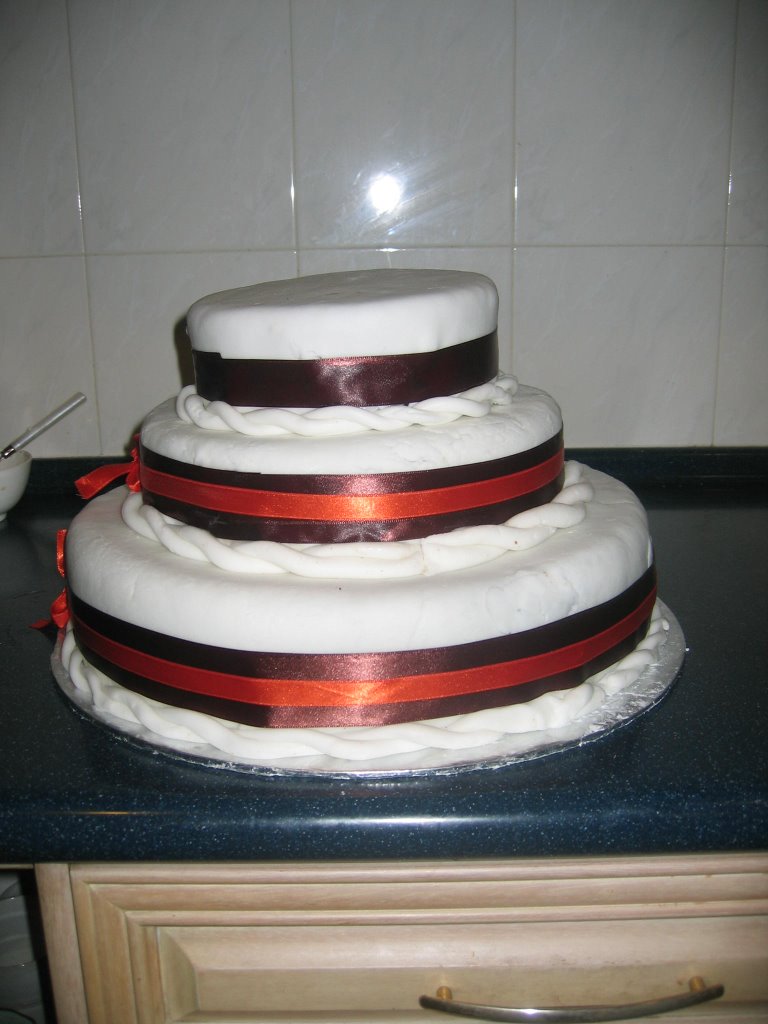
The next step, (after going to jalan jalan first in 1 utama...had to de-stress a bit), was to place the bows in position. The bows and its layout are dictated by the bride herself, and ribbons supplied by her too, based on the original dimensions of 14", 8" and 5". Its a good thing people remember their formula for circumference. Argh, what is it again? 4 Pi R? So there I was merrily putting the bows around the cake, when all of a sudden, at the last layer, I realised we were short. Argh, did the bride bungle her form 4 maths? Then I realised AAAAAAAAAAAARGH, I had changed the tier dimensions to 14", 10", 7"!!!!! DIEEEEE!!!!

Fortunately, she said the same color ribbons are available at MPH, (near me office), but at 4 times the price of what they were in Jalan TAR. Jln TAR is a veritable habedashery if you intend to tie the knot. It is the silicone valley of wedding implements.

So, here it is. Yup, looks lop sided. Sigh. Well, if love covers a multitude of sins, I am hoping decoration will cover a multitude of flaws as well.


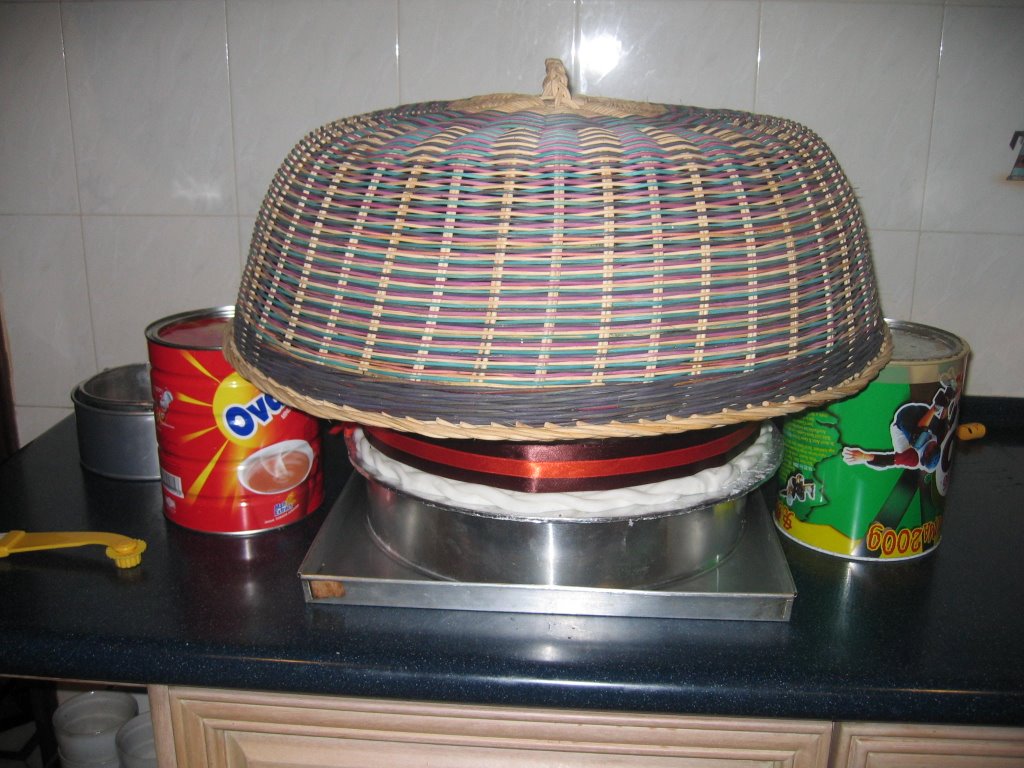
Ah, saga not over yet. Now, unless you happen to own a hotel, or a restaurant, you'd find that in a normal household, you are NOT equipped to store anything of this size. I didnt want lizards dropping in from the sky, or ants crawling up, so whattttttt does one do???? What to do, what to do??? Then the genius in me thinks, okay, support it over an island, surrounded by a moat, so the ants cant swim across, and cover it with a tudung saji so lizards wont drop in. But tudung saji also not big enough. So, this was my solution.

Cake suspended over a moat. (The baking tray is filled with water)


Tudung saji, elevated by two tins, as a roof over the cake.

Thursday, June 22, 2006

Here Comes The Bride....Part 2

It suddenly dawned on me, that my original proposed tiers, of 14", 8" and 5" would look a bit disproprotionate, and for some reason, I do not possess a 10" pan. So, braving the torrential storms yesterday, I made my way to the baking supply haven, BAKE WITH YEN, in Taman Mega, and got myself a 10" pan, as well as a 7" pan.

So now, the tiers are going to be 14", 10", and 7". Somewhere along the line, also prompted by a suggestion from boo_licious, to make a different flavour for 1st and 2nd floor. The ground floor is vanilla butter, and the top two floors are chocolate butter. Sssshhhh, I made a real boo boo during the mixing.... the resulting cake seems a bit hard, but at this point, I am so stressed I am inclined just to wrap a round cardboard hat box in fondant, and buy some cake to serve as a sheet cake. There's nothing worse than sitting in the crowd to have someone next to you go ptoooi, who the heck made this.....!!! It happened at a recent birthday, when someone commented that this particular cake was too sweet.


Duhh, the icing is virtually pure icing sugar and butter, what do you expect!!! I don't mind friends telling me this, but its a bit uncomfortable to be criticised at a distance...in that tone, "where the heck did this cake come from".

Anyway, because of the baking, was home bound all night. At least managed to finish watching all of Season 2 of Desperate Housewives.

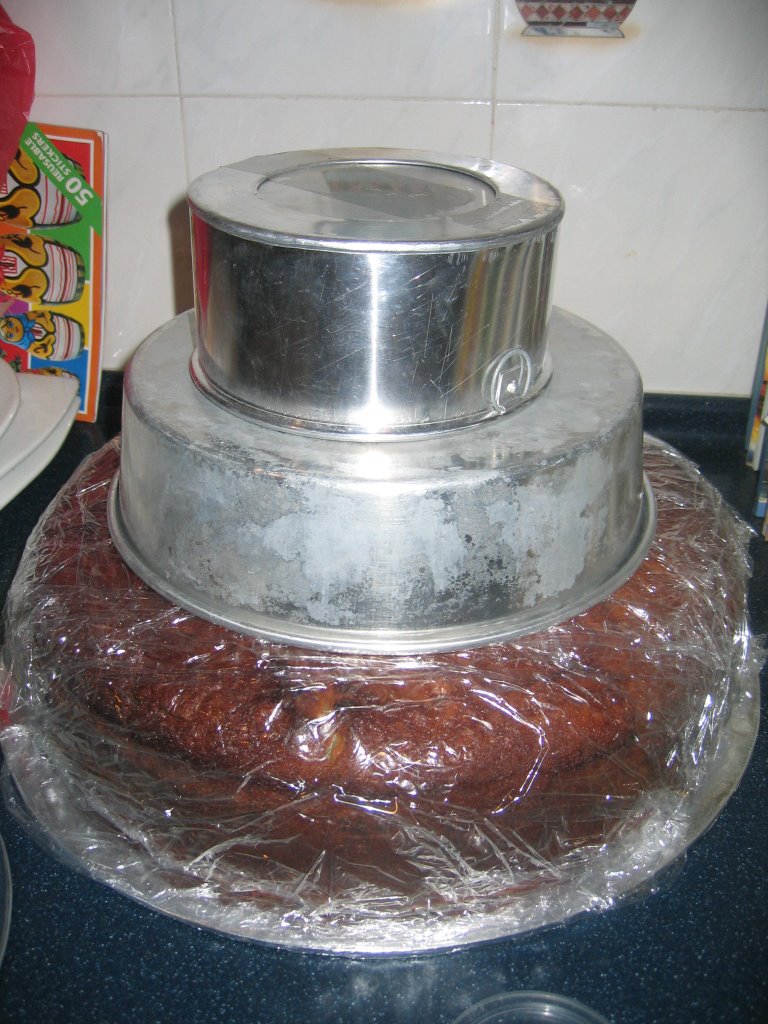
Another thing that has been confusing, and terrifying me, is the method of stacking. Some books say it's absolutely vital to have a cake board for each layer of cake, ie, cake sits on cake board that sits on the bottom cake....but other books seem to do away with it. I reckon that since the ground floor seems mammoth, it should be able to bear the weight of a puny 10" and 7" cake. Argh, should have had a back up plan. Maybe I better head to Ikea tonight and buy those concentric circular boxes that they sell....

This is the naked un-iced 3 tier cake.

Wednesday, June 21, 2006

Sub Plot : Fondant Recipe for Snowdrop


It took me awhile to figure out that SUGARPASTE icing and FONDANT are more or less the same thing. Except, apparently, the original European Fondant involves some sort of cooking. As snowdrop pointed out in his/her comment in previous post, some fondant recipes use egg white.

The one I am using for the wedding cake, is from Australian Women's Weekly (to the uninformed, its a series of cookbooks...I don't consider myself an Australian Woman who read a weekly magazine).

For 500g of fondant
2 tablespoons water, with 3 teaspoons gelatine, dissolved together over low heat

When gelatine is dissolved, and make sure that it is, or you get unsightly clumps of booger (pei see) looking particles, add 2 table spoons liquid glucose, and 2 teaspoons glycerine.
Now, despair not, these are quite down to earth ingredients that you can get at the baking supply shops. Probably not in the supermarkets.

The resulting solution should be a viscous, but flowy liquid, the consistency of pouring honey. (not the PURE manuka honey which is like coagulated oil).

Slowly pour and stir gradually into a bowl of 480g (3 cups) sifted icing sugar. I hear there's a brand of icing sugar in Chang Tung (that's a bit costlier than normal), that doesn't need sifting. Continue stirring with a wooden spoon, until all the liquid has been poured. When you can no longer stir, pour all the stuff out onto a surface that's powdered slightly with ICING SUGAR. (not flour). Knead (and this is where I got my meta carpal tunnel syndrome) until it becomes a nice smooth pliable chunk. Its quite amazing, actually, that so little liquid, and so much sugar, can all come together like that.

Here Comes The Bride....Part I

Actually, this isn't a recipe post.....it's a plea for help.

A few months ago, a very dear friend, who will be getting wed this weekend, (wed as in married, not shortform for wednesday), asked me if I could bake her wedding cake. The initial reaction, was, "Wow, I am honored that you would entrust me with such a task". And that was six months ago, so I figured, hey, what the heck, I'll have time to attend cake decoration classes, cake baking classes, etc in that time, to prime myself up for this gargantuan task. As it turns out, 6 months flew by faster than you can say, FONDANT, and here I am, facing this mountain of flour, eggs, butter.... very stressed. So I am writing this, so that yall can cheer me on to the finishing line.

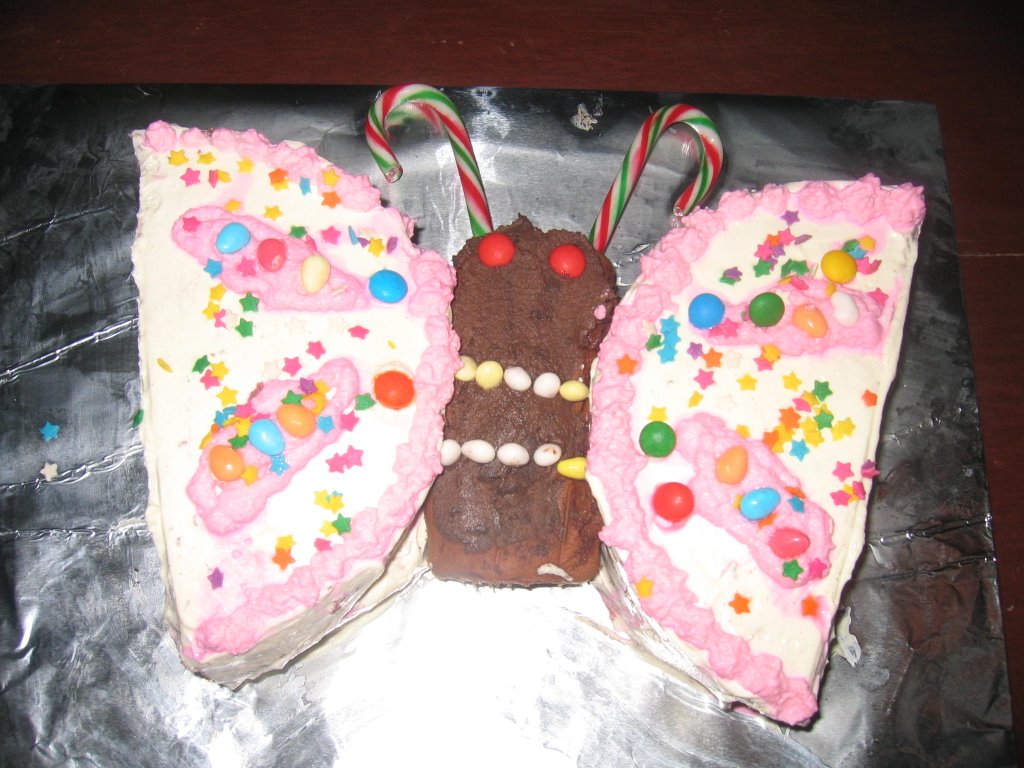
Anyway, yesterday, before heading off to the gym, I had to assemble together a birthday cake for my little niece, who wanted a butterfly cake. I didn't want to use the usual butter icing method, with butter cakes or chocolate cakes, so I took a risk, and used fresh whipped cream instead. The cake is basically the chocolate oreo cake that I posted here earlier. I found out that whipped cream is not an easy medium to use for decoration....especially real dairy whipped cream. And coloring it, AIYO, made it into a flowy stream of pink mush. Very stressful. Nevertheless, thankfully 5 year olds aren't too picky about their cakes, and as long as its colorful, I guess can get away with it. The cake itself of course is quite nice to eat.

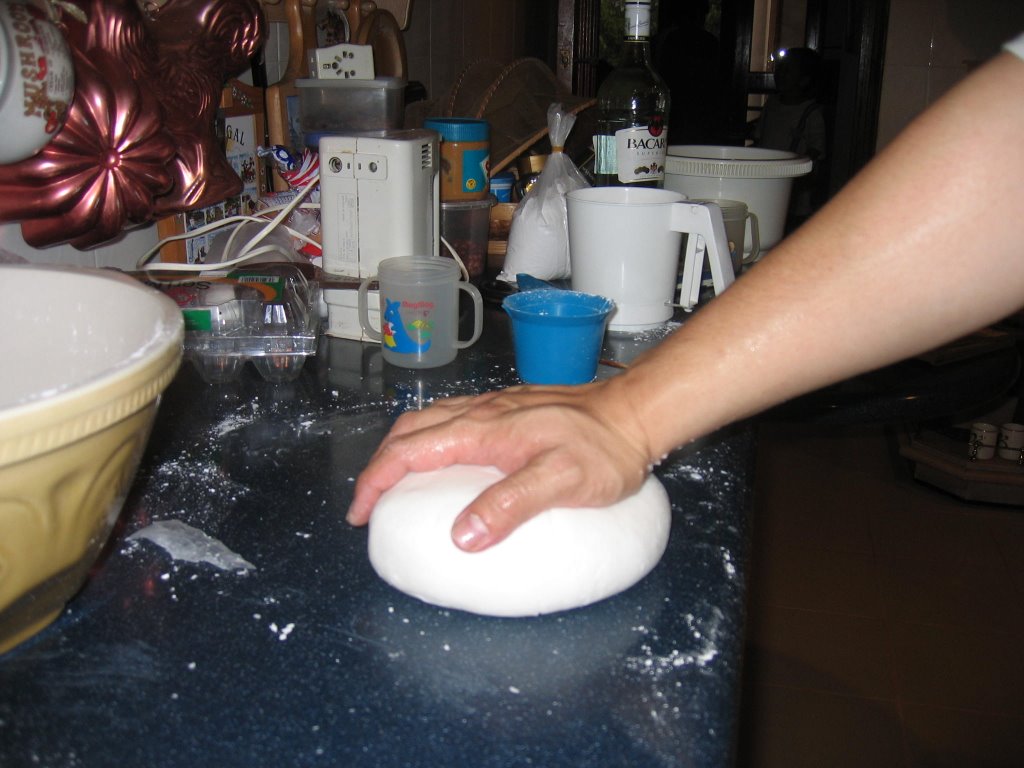
After the birthday party, it was time to embark on my wedding cake. Actually I had already spent 1½ hours the night before kneading about 5kg of fondant (sugarpaste) icing, which comprises about 5kg icing sugar, loads of liquid glucose, glycerin, gelatine, AND a workout equivalent to an hour of body pump!!! AHHH, now I know why my thumbs are aching!!! I'll never make it as a masseur.

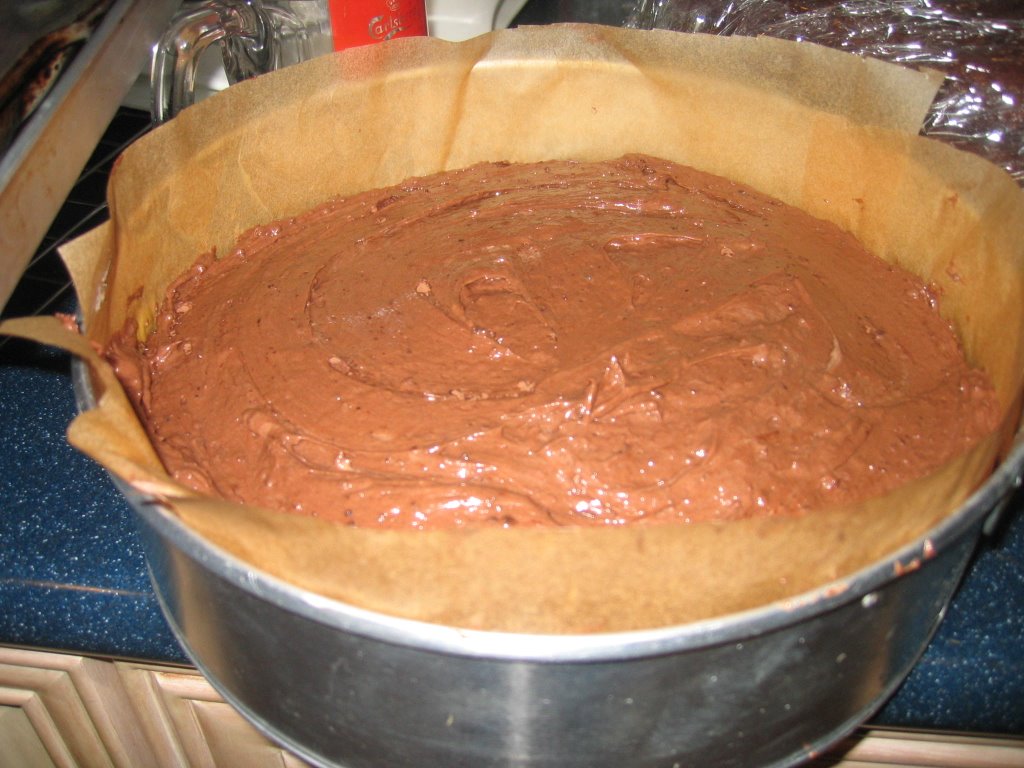
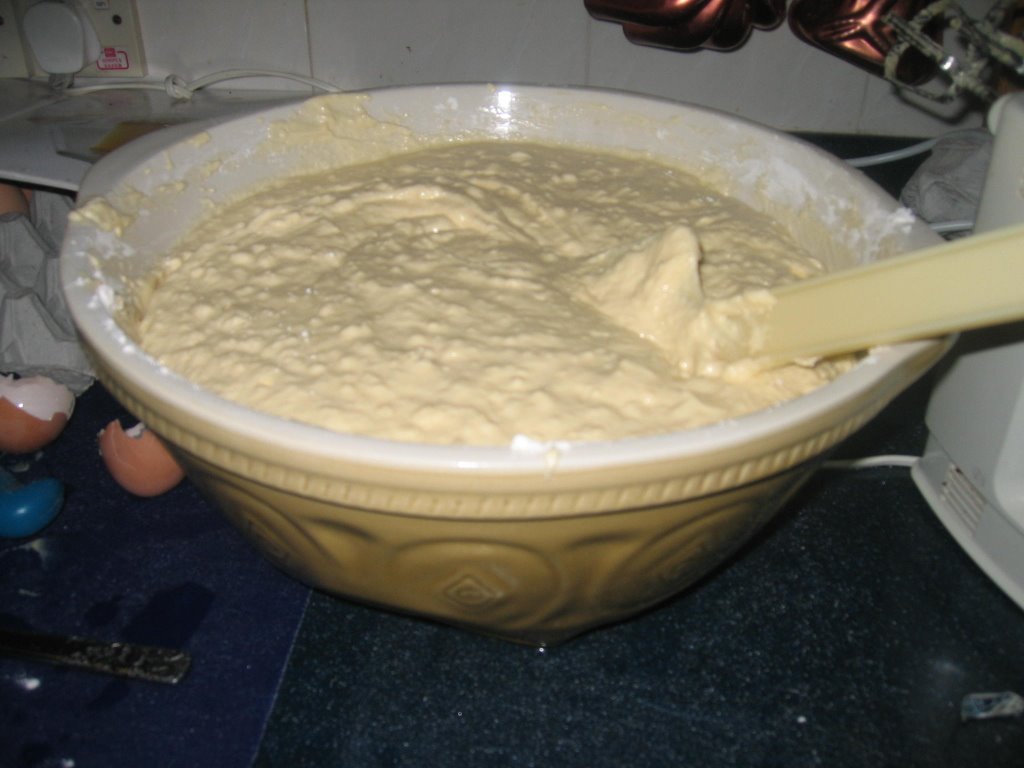
Decided to get the bottom tier of the 3 tier cake out of the way. It is a 14" diameter pan, which is 3-3½ times the volume of a normal 8 or 10 inch pan. The batter had to be made in two batches, as the mixing bowl could not accommodate that much ingredients.
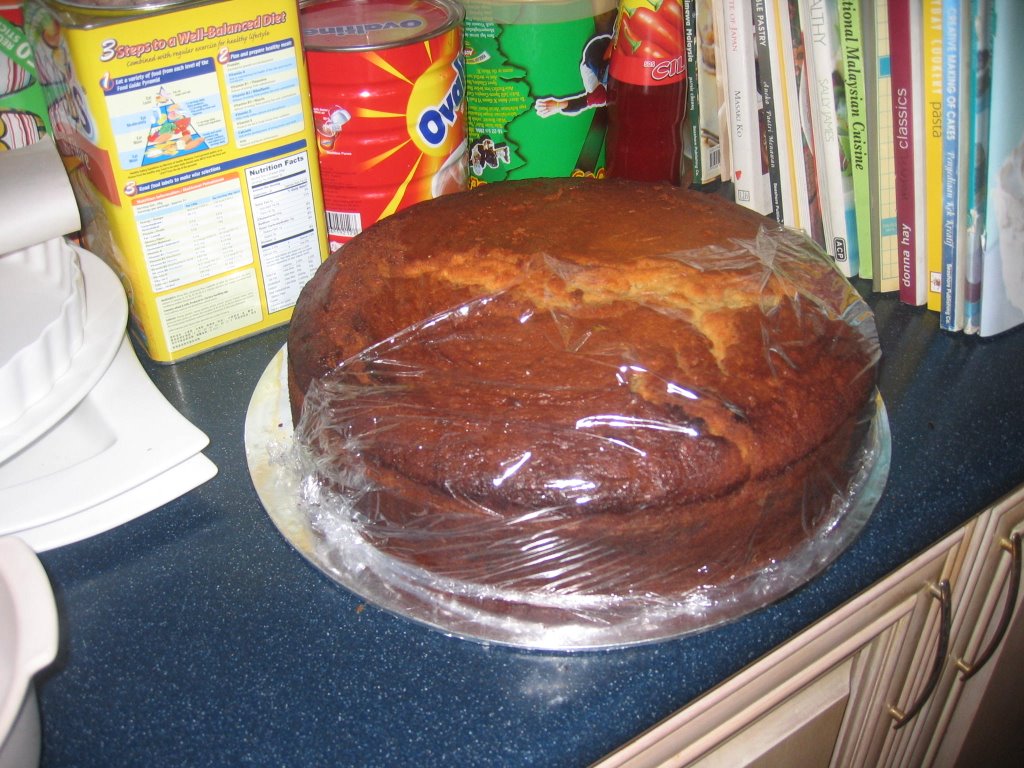
In short, I used 5 blocks of butter, ie, 1.25kg, 1½ kg self raising flour, 1 kg sugar, 20 eggs, 1 litre milk, 1 bottle of vanilla essence, and the equivalent of a half hour shoulder workout. Had to stay up till 1 am watching downloaded episodes of Desperate Housewives, as the cake went into the oven at 10.30, and took that long to cook. ie, nearly 2½ hours. Now I worry it might have been overcooked, as the crust looks a tad hard.....behold, the finished cake. Stay tuned for further developments.

Wednesday, June 14, 2006

Chocolate Peppermint Cake


On Monday, boy no1 asked me, "Papa, why haven't you used the peppermint essence that you bought?". Considering the essence was bought like 6 months ago, I am amazed that he remembers it even exists. Coincidentally, my mother overheard the conversation, and said she too had a "craving" for mint chocolate cake.

So, following the recipe in Australian Women's Weekly, here it goes.

Firstly, looking at the recipe, I couldn't figure out if the quantities were correct, coz a mental calculation told me it sounded way not enough. This quantity is for 2 loaf pans of 26 x 8 cm. I used a 26 x 12 cm pan, and the cake was very small. Shallow.

So, I recommend either doubling or 1 ½ ing the quantities.

Cake:
125gm butter
100 gm dark/cooking choc
3/4 cup castor sugar (got sugar shortage in Malaysia at the moment, so might want to reduce further)
1 cup water

1. Melt the above ingredients together in a saucepan over low to medium heat, until all combined. Should be quite a fast process. I suspect you can do it in the microwave as well.

3/4 cup self raising flour
1/2 cup plain flour
2 tablespoons cocoa
1 beaten egg

2. Unbelievably simple as this may sound, whisk together the melted stuff with the above combination of dried sifted stuff, plus the egg. When all combined, poured into the prepared loaf pans (or in my case, pan).

3. Bake on low oven (i set it at 160C) for 30-40 mins.

Peppermint Cream
Now, oddly enough, I had to HALVE this recipe. Quantities below are already halved.

65 gm butter
1 ½ cups sifted icing sugar
1 table spoon milk
1/2 teaspoon peppermint essence

Beat the butter until pale and creamy. Add in icing sugar and milk, and beat until creamy. Add in essence as well. Now, don't be like me, and try to be smart. As it was my first time handling peppermint essence, I thought, huh? ½ teaspoon? Where got kick!!!!

So I put in 1 teaspoon instead, and as it turns out, it was BITTER and HOT. So, stick with 1/2 teaspoon. Had to redo the whole thing.

Chocolate ganache - Melt 150gms chocolate with 1/2 cup cream, and dash of peppermint as well.

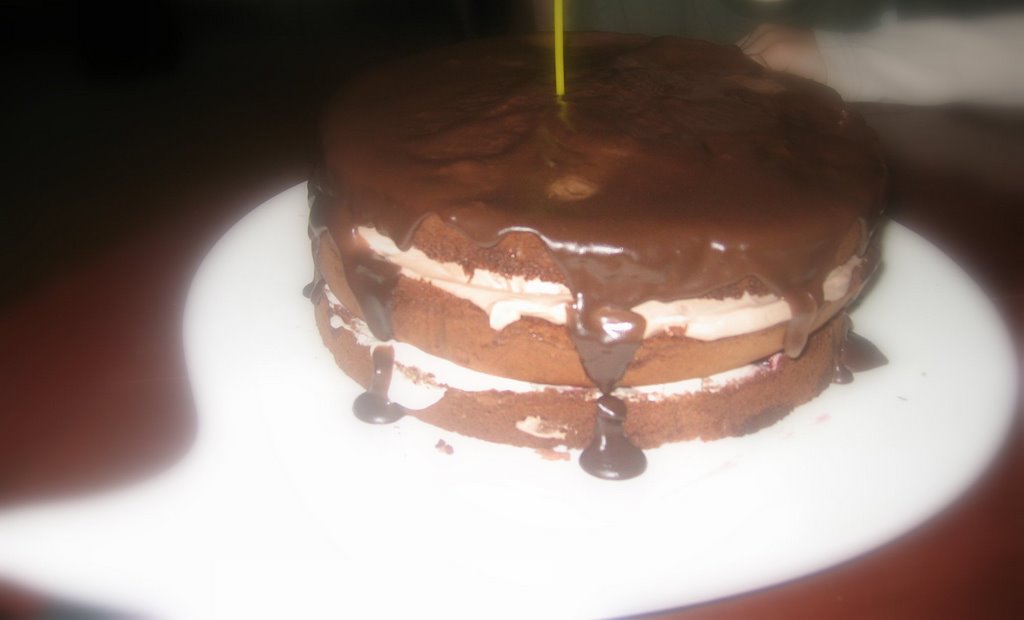
When cake is cooled, slice halfway horizontally, to get two layers. Spread 2/3rds of peppermint cream in between, like a sandwich, and another strip along the top. Pour ganache over the whole thing.

Verdict: Initially I thought it was going to be a disaster, but it turned out really well. Sorry about the crappy picture, aesthetically one could do loads more to make it look better. But taste wise, yummy.

Monday, June 12, 2006

Humongous Cream Puffs


One evening, as I was walking around in mid valley megamall, in the lower ground level, I stumbled across that shop, called BEARD PAPA, that sells cream puffs. Now, there are many places that sell cream puffs, in MVM, including LaBoheme, which is part of Jaya Jusco. And as a general rule, I do not eat commercial cream puffs, because I have yet to find one with a filling that I like. I love the Chocolate Eclairs in Valerie Patisserie, but at the risk of sounding pretentious, that's in London. Valerie's eclairs ooze fresh cream, and the choux pastry is just the right texture, with a lovely chocolate sauce to complement the fresh cream.

Eclairs and cream puffs are the same family, the latter being the long tall brother, whereas the cream puff, the short stout sister. Just like any person, what determines its character is what lies within, and it is no difference with cream puffs.

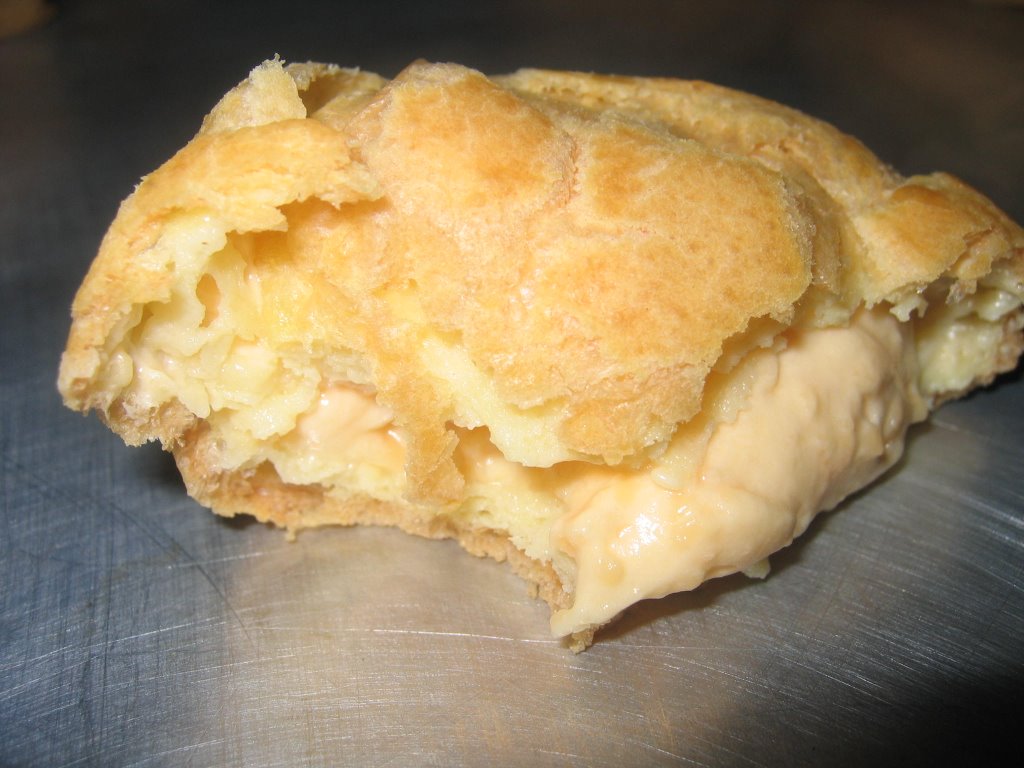
Anyway, I noticed these cream puffs at Beard Papa were selling at RM3.00 a piece, which is like THREE times the price of the normal cream puffs at La Boheme. And, they seem to sell like hot cakes, no pun intended. So, obviously, curiosity got the better of me, and I very sheepishly bought one to sample. My assistant food taster by my side sank his teeth into the cream puff, and pronounced it thumbs up. The choux pastry was just the right texture, crispy-ish on the outside, but nice and soft on the inside, and the filling... now, I am not a major custard fan, preferring real fresh cream, if possible, but I concede that this particular filling was rather delectable.

So, I decided last Thursday night to experiment with my own version of these cream puffs.

Choux Pastry (pronounced Shoe)

80gms butter
1 cup water
1 cup flour
4 eggs

It's quite baffling how anyone could have figured out how to make this, or invent it.

1. Place the butter and water in a pot, and bring to a boil. Common sense and basic integrated science dictates that water and oil do not mix, and it doesn't. Nevertheless, just follow the instructions, with faith.

2. Chuck in the sifted flour, and continue stirring until it forms a ball of dough. Again, fascinating how this transformation takes place. A ball of yellowy dough should form, as it comes off the side of the pot.

3. Transfer the dough into a mixing bowl, and on slow speed, beat in the eggs, ONE by ONE. You should get a lovely glossy batter, which is quite thick, but not so thick that you need a bulldozer to wade through.

4. Spoon heaped tablespoons onto a baking tray, no need to grease. Bake in a 180C preheated oven. I think this recipe yields about 10 gigantic puffs.

You should be able to tell when its ready. It helps to pierce the puff when its cooked, and leave it to bake another couple of minutes, to let the steam escape from the inside.

Filling: Well, whipped cream, or custard cream would go quite well, but if you want to be fancy, you could whip up a custardy kind of cream. Easiest method is to make some instant bird's custard, and fold it into some whipped cream. Easy, and rather good to eat. Generously pump using an icing syringe, into the puffs. For an extra dash of decadence, pour chocolate sauce over the puffs, to make it into a profiterole. It may feel all airy and light, but I'm sure calorie wise, it is anything BUT light.

Wednesday, June 07, 2006

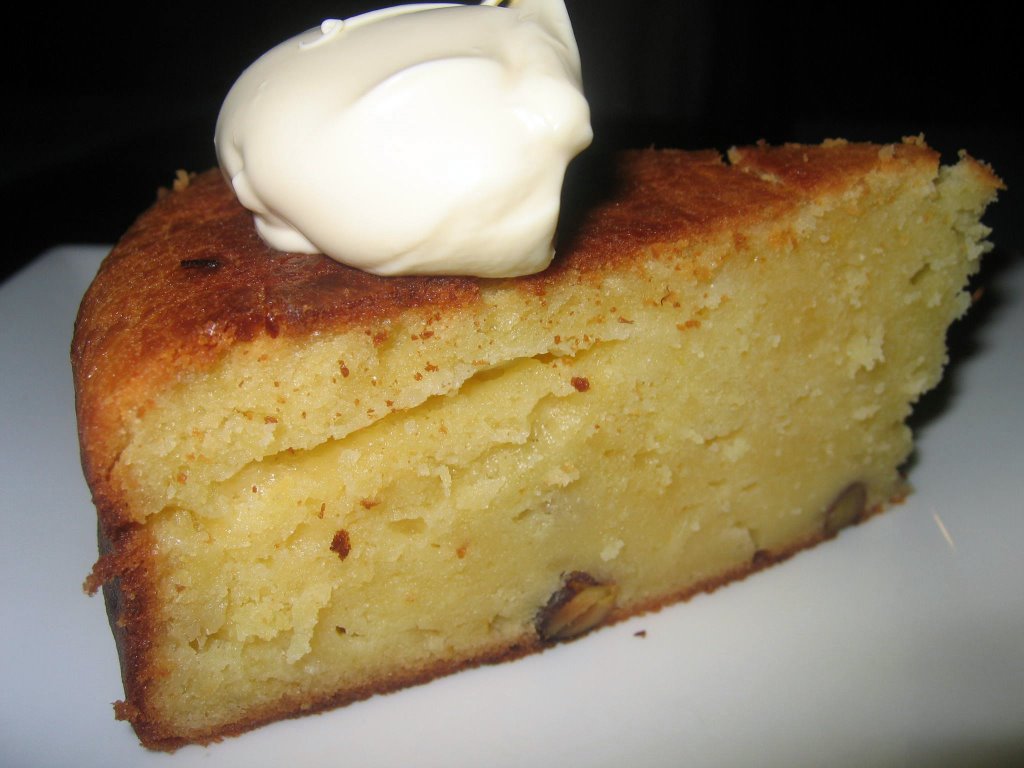
Lemon Sour Cream Pistachio Cake


In a hurry, and need to whip up something fast, yet substantial, and cakey? Well, if you like tangy cakes, which are really quite rare commercially, try out this recipe. I know it might look similar to some other cake that has been posted here, but hey, a butter cake is a butter cake, and short of plonking in artificial coloring, the predominant colors of egg and butter will render it that unmistakable rich yellow.

Ingredients:
250gms butter, softened slightly
1 ¼ cup castor sugar (original recipe 2 cups)
grated rind of 2 plump lemons
juice of one plump lemon (yar, use back the same ones that was shaven)
6 eggs
2 cups plain flour

¼ cup self raising flour (though I don't see HOW this small amount could make a difference)
1 cup of pistachios
1 tub (about 200gms) sour cream. (The local SUNGLO brand will suffice. No need for exorbitantly priced creme fraiche or bulla's sour cream)

1. Oreheat oven to moderately slow, I think 160C or so, and line a 8" round tin.
2. Cream the butter with the sugar and rind, until light and fluffy.
3. Beat in eggs one at a time. The resulting mixture should be a glorious yellowy batter.
4. Add in half the sour cream, and half the sifted flours. Mix. Repeat procedure.

(note: the next time I make this, I am just gonna beat in the sour cream so that it's properly mixed. I somehow can't seem to get the sour cream to "dissolve" entirely into the batter, resulting in some clumps of sour cream in the finished cake, which is not nice).

5. Chuck in pistachios and stir until all mixed. Pour into the pan and bake for 1 hour or so.
6. Serve with a dollop of fresh pure cream. It really is the best complement to the slightly sweet, sour, tangy taste of the cake.

You can probably tweak the sweetness vs sourness depending on your sour threshold. As I said, it's unlikely you'll find anything like this commercially, in this land of condensed milk and diabetes inducing teh tarik, because it probably is too sour for the general populace. Adjust accordingly by trial and error. Helpful eh?!

Monday, June 05, 2006

Whipping Up Quick Supper For Friends

Every Friday, I have my cell group meeting, consisting of about 6-8 regulars, and if everyone comes, about 12 adults. But that is rare. So, estimating how much supper to make for the group can be quite a hit and miss thing. Anyway, usually I would make either some pizzas, quiche, sausage rolls, (like pigs in blanket kinda thing), and because I usually try to squeeze in gym in those hours, it helps to make something that requires minimum supervision, so that I can leave word with the house to take out the item from the oven at a certain time, etc. Last friday, it was also a friend's birthday, and I got a last minute sms asking if I could make a cake.

Anyway, this combination of items, takes about 1 hour preparation time, and 1 hour cooking time.


Bacon, Mushroom and Coriander Quiche

Pastry

1. Ever since I discovered the food processor, pastry is the least of my problems. Blitz 2 cups flour, 125gm butter until all crumbly. Slowly add using the pulse function, tablespoons of iced water, until cohesive. I find its best to stop just before the thing becomes a whole ball.

2. Refrigerate pastry for 30 minutes

3. Roll out pastry into a 9" pie plate, or in this case, my spanking new ceramic quiche dish, from metrojaya sale. I later on found out the shortcomings of the ceramic plate. Can't remove the quiche in its entirety onto a serving plate. I guess if I placed some baking paper at the bottom, it would be possible. This is why I always use the plate with removable base.

4. Blind bake pastry for 10 minutes or so. (ie, bake with a layer of rice or beans, on the pastry layer). Don't forget to pierce the base with a fork, or pastry will puff up like jabba the hutt.


While pastry is baking, in a large bowl, slice 10 slices of back bacon, 3-4 button mushrooms, a healthy bunch of coriander, 2 slices cheddar cheese, and mix with 4 eggs, 1 cup cream, 1/2 cup milk. Mix all together.

5. After removing blind bake, bake pastry for another 10 minutes until browned, before pouring in the filling, and bake for another 20 minutes until filling cooked.

Chocolate Sponge Cake with Blackforest Filling


I daren't call this a blackforest cake, because it may raise the ire of the true blackforest cake specialists. But, it shares similar ingredients with its famous cousin.

1 Qty Chocolate Sponge

2 cups whipped cream
1 can pitted dark cherries, with syrup reserved
200 gms dark chocolate melted with 3/4 cup cream

Cut the cooled chocolate sponge into 3 horizontal layers. Spread the reserve canned juices onto each layer. For the first layer, place half the whipped cream, and spread the cherries over the cream. Alternatively, crush the cherries into the cream mixture.

On second layer, use about 1/3rd of the melted chocolate, mix into remaining whipped cream, to form a layer of chocolate cream.

Pour remaining chocolate ganache onto the cake, and refrigerate for at least a few hours. It turned out to be quite a hit. Not a morsel left.

Wednesday, May 31, 2006

Chocolate Fondants "Tak Jadi"


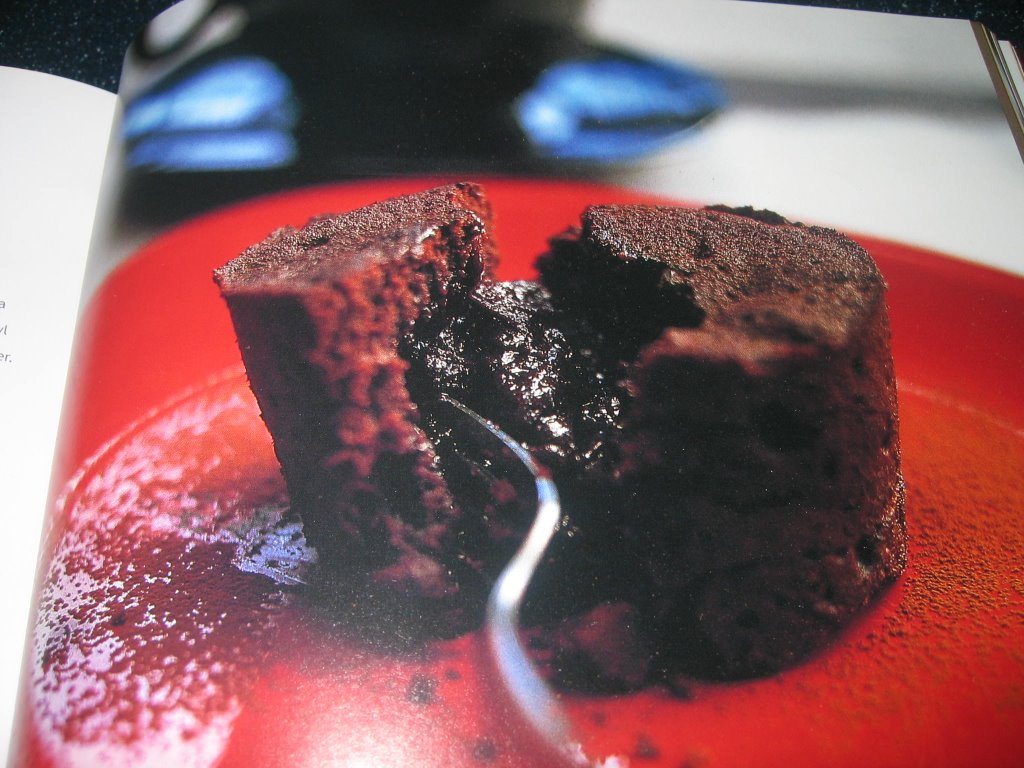
The picture from the book, DISHY DESSERTS has fascinated me for some time now, because this looks like another version of chocolate cakes with a molten centre. And recently, at the Alliance Francaise, in Lorong Gurney, I sampled their chocolate fondant, which didnt look anything to shout about from the outside, but the minute you sank you teeth into it, YUMMMMMMY. (the cafe there is part of the french culinary school, and gourmet supply shop, Gourmandines).

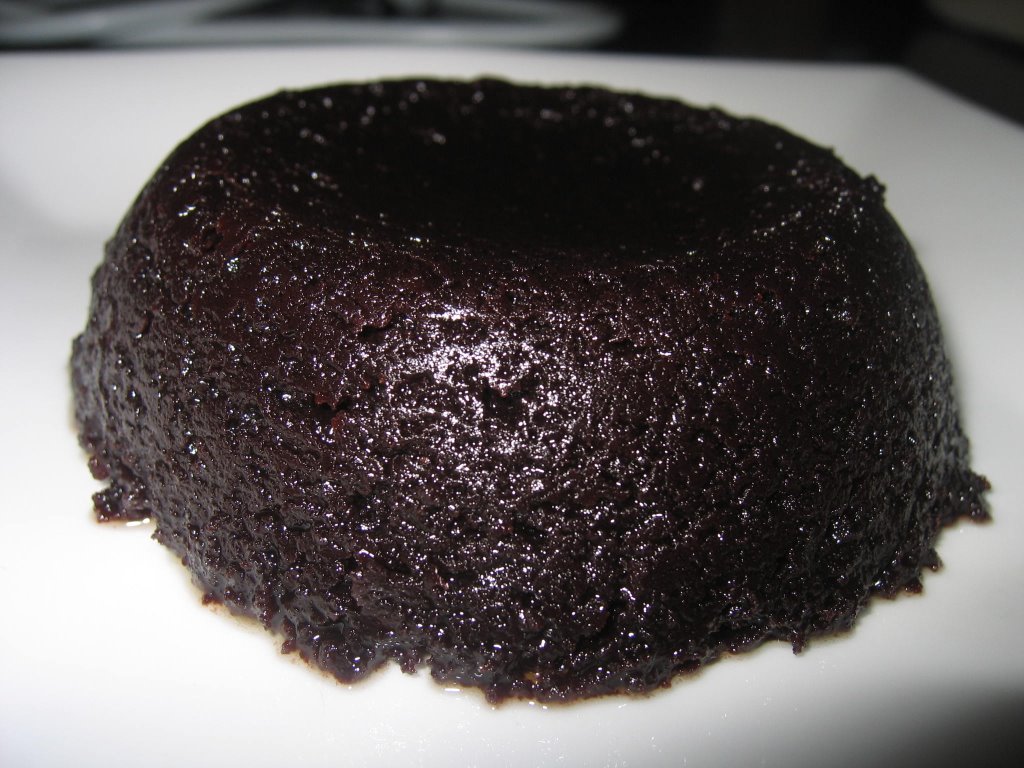
Anyway, since Tuesdays are baking experiment days, I decided to be bold, and try this particular recipe. Maybe I did it wrong, so I'm putting it here so that someone else can try it and tell me if it worked. As you can tell from my pics, mine looks NOTHING like what its meant to look like in the book.

Shoobee doo lang lang:

250gm unsalted butter (now, this seemed like a HECK of a lot of butter)
250 gm dark chocolate

Melt the chocolate and whisk in the butter. (I shortcut this by zapping in microwave. Result was a very watery choco butter solution)

1 cup plain flour
3/4 cup cocoa

Sift together in a bowl. Put aside.

2 eggs, 1 cup sugar

Whisk together, until light and creamy.

Add this into the melted chocolate. Mix, and fold in the flour & cocoa. Pour into 6 individual "dariole" moulds...(dunno what that is, but I just used some tart tins), 3/4 full, and refrigerate for at least 3 hours. (I only refrigerate for 2 hours)

Take out from fridge, plonk onto a baking tray, and bake at a preheated 200C oven for 12-14 minutes.

Now, mine looked and smelt good, but the texture was awful. Also, it was sickeningly rich, I think the butter and chocolate just makes one nauseous after two mouthsful. The texture was all wrong, it was like a mousse, with uncooked flour.......

Any takers? Try and let me know.

Tuesday, May 30, 2006

Pigs In Blankets


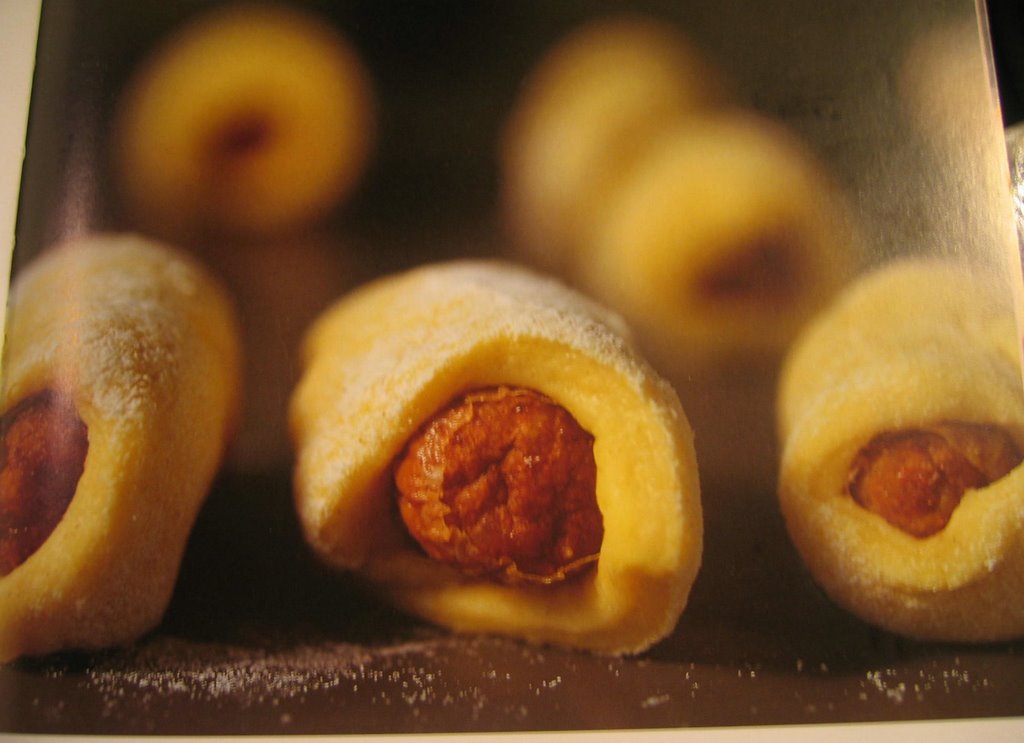
Nigella Lawyson's Pigs In Blanket


My Pigs In Blanket


One of the reasons why I love reading Nigella's cookbooks and watching her show, is how she makes everything seem so effortless, and so human. Not to mention the doses of wit thrown in sometimes. And who on earth cooks in their nighty, with perfectly manicured nails and coiffured hair???

Anyway, this recipe is from Nigella Bites, and I happened to catch it on TV as well. So, last friday, I decided to be adventurous and try this instead of the normal sausage rolls, for my Cell Group. Unlike her, I didn't use pigs, but chicken, but somehow, chickens in blankets doesn't have quite that same ring.

Blankets:

3 cups self raising flour, 1 heaped teaspoon salt
1 cup grated cheddar cheese
1 egg & 1/2 cup vegetable oil
1 cup milk

Pigs : Cocktail franks, or in this case, ayamas sausages hacked into two

Mix the sifted flour with the grated cheddar. Mix the egg, oil and milk together, and dump into the flour cheese mixture and stir until you can a cohesive dough. Add more flour if necessary.

Roll out any which way you want, but not too thick, because, (and this is one of my all time favourite Nigella phrases), these ARE pigs in BLANKETS, not pigs in DUVETS.... roughly cut out into rectangles or rough squares.

Roll up the franks/sausages at a diagonal, and glaze with egg & milk solution. Bake in 220C oven for 10 minutes or so until brown.
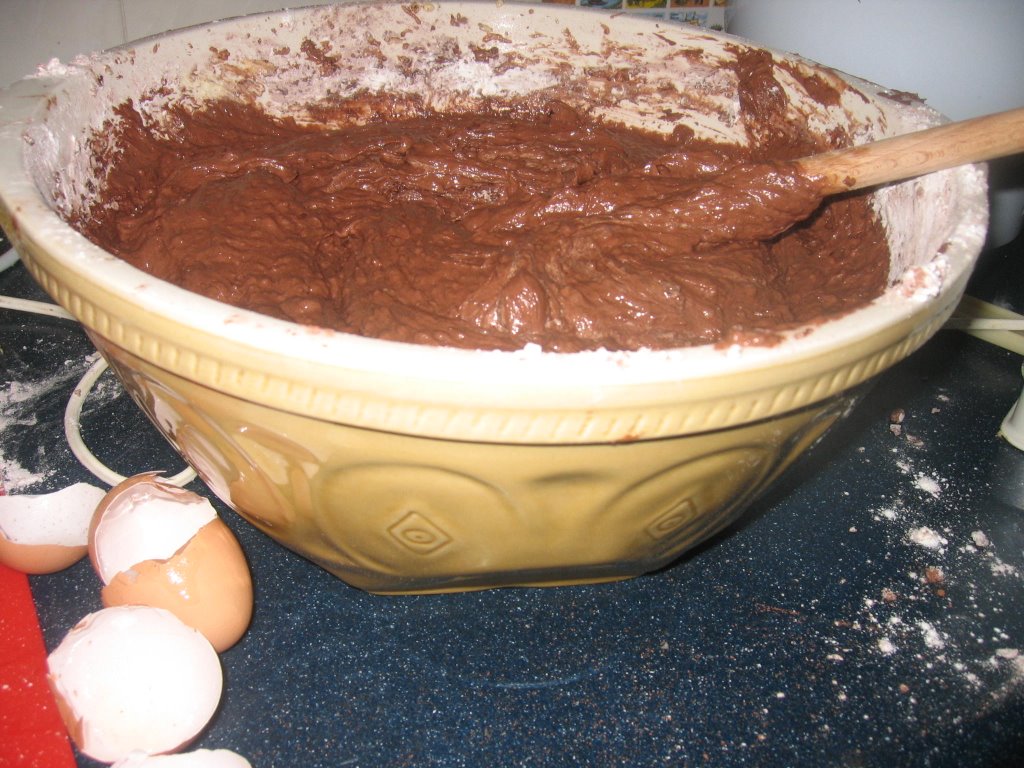
Actually, tastewise, its nothing to shout about, as I personally prefer buttery flaky pastry, and this one, devoid of butter, tastes a bit too healthy, but when served warm, it's not too bad. I'd recommend tweaking the blankets with some butter, for a quick pastry fix. And its really fast to make, so if your audience are not so discerning, or are mainly kids, its much cheaper than using pampas puff pastry.