Wednesday, May 31, 2006

Chocolate Fondants "Tak Jadi"


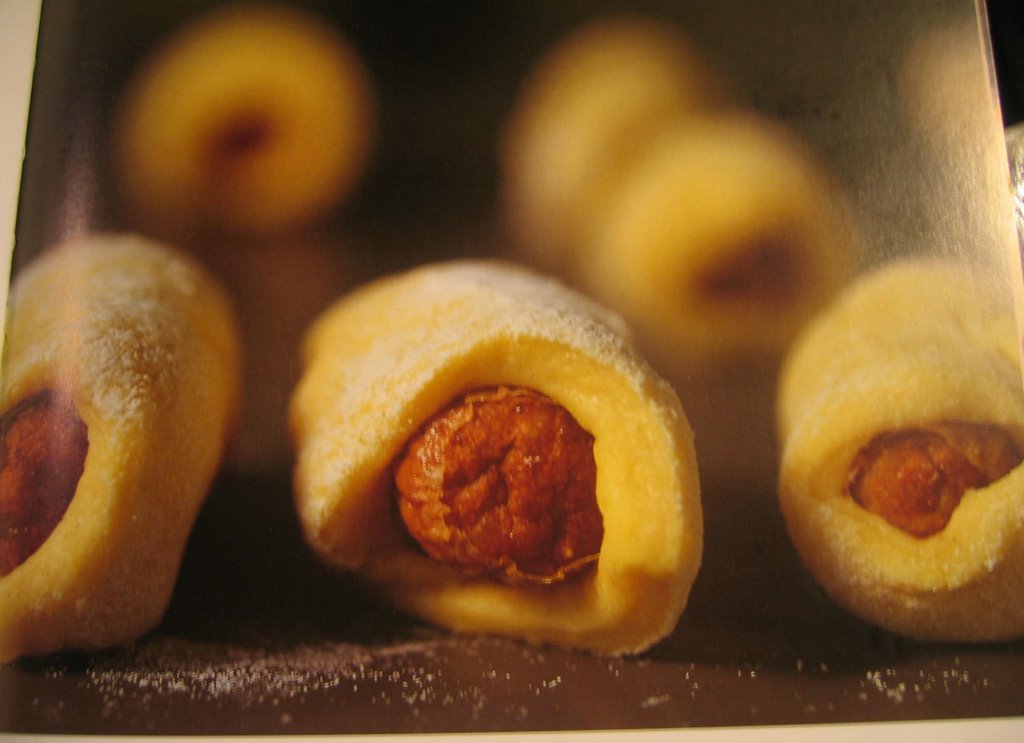
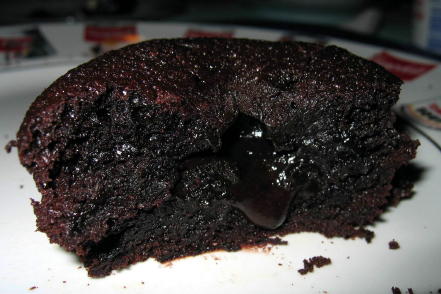
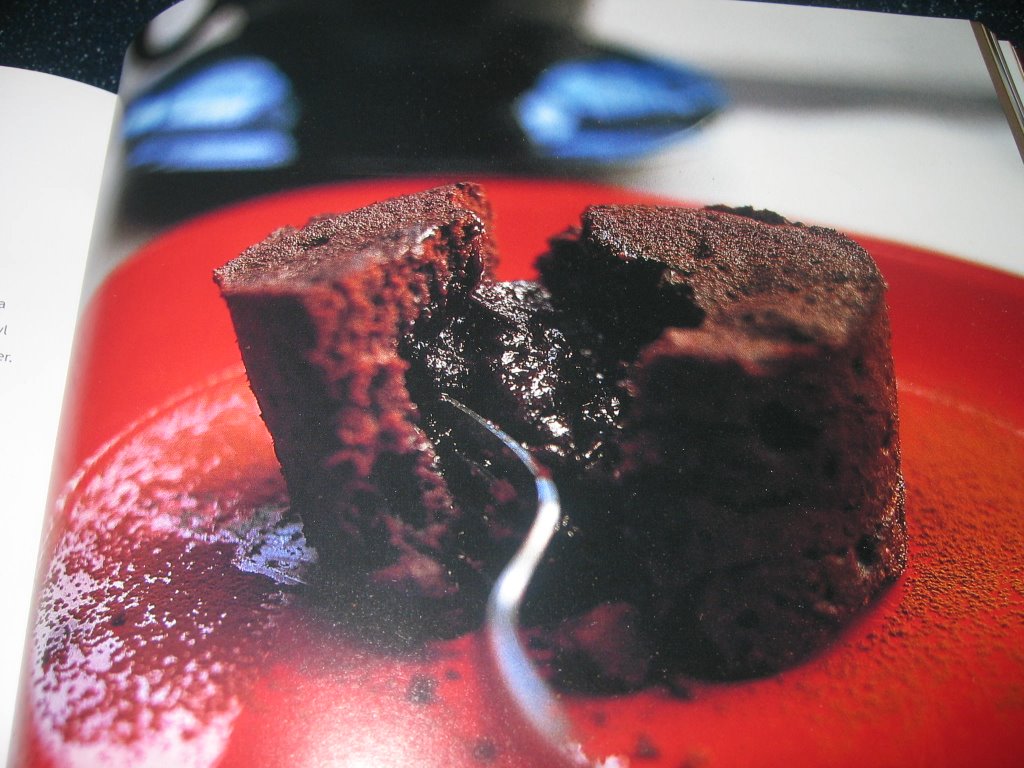
The picture from the book, DISHY DESSERTS has fascinated me for some time now, because this looks like another version of chocolate cakes with a molten centre. And recently, at the Alliance Francaise, in Lorong Gurney, I sampled their chocolate fondant, which didnt look anything to shout about from the outside, but the minute you sank you teeth into it, YUMMMMMMY. (the cafe there is part of the french culinary school, and gourmet supply shop, Gourmandines).

Anyway, since Tuesdays are baking experiment days, I decided to be bold, and try this particular recipe. Maybe I did it wrong, so I'm putting it here so that someone else can try it and tell me if it worked. As you can tell from my pics, mine looks NOTHING like what its meant to look like in the book.

Shoobee doo lang lang:

250gm unsalted butter (now, this seemed like a HECK of a lot of butter)
250 gm dark chocolate

Melt the chocolate and whisk in the butter. (I shortcut this by zapping in microwave. Result was a very watery choco butter solution)

1 cup plain flour
3/4 cup cocoa

Sift together in a bowl. Put aside.

2 eggs, 1 cup sugar

Whisk together, until light and creamy.

Add this into the melted chocolate. Mix, and fold in the flour & cocoa. Pour into 6 individual "dariole" moulds...(dunno what that is, but I just used some tart tins), 3/4 full, and refrigerate for at least 3 hours. (I only refrigerate for 2 hours)

Take out from fridge, plonk onto a baking tray, and bake at a preheated 200C oven for 12-14 minutes.
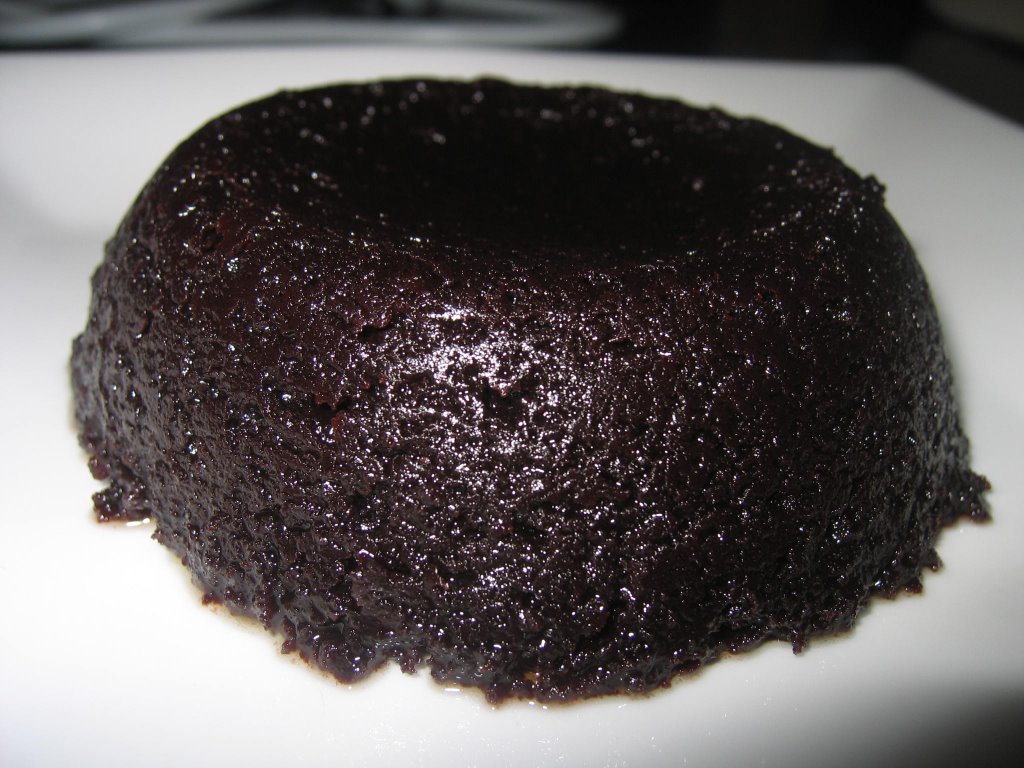
Now, mine looked and smelt good, but the texture was awful. Also, it was sickeningly rich, I think the butter and chocolate just makes one nauseous after two mouthsful. The texture was all wrong, it was like a mousse, with uncooked flour.......

Any takers? Try and let me know.

Tuesday, May 30, 2006

Pigs In Blankets


Nigella Lawyson's Pigs In Blanket


My Pigs In Blanket


One of the reasons why I love reading Nigella's cookbooks and watching her show, is how she makes everything seem so effortless, and so human. Not to mention the doses of wit thrown in sometimes. And who on earth cooks in their nighty, with perfectly manicured nails and coiffured hair???

Anyway, this recipe is from Nigella Bites, and I happened to catch it on TV as well. So, last friday, I decided to be adventurous and try this instead of the normal sausage rolls, for my Cell Group. Unlike her, I didn't use pigs, but chicken, but somehow, chickens in blankets doesn't have quite that same ring.

Blankets:

3 cups self raising flour, 1 heaped teaspoon salt
1 cup grated cheddar cheese
1 egg & 1/2 cup vegetable oil
1 cup milk

Pigs : Cocktail franks, or in this case, ayamas sausages hacked into two

Mix the sifted flour with the grated cheddar. Mix the egg, oil and milk together, and dump into the flour cheese mixture and stir until you can a cohesive dough. Add more flour if necessary.

Roll out any which way you want, but not too thick, because, (and this is one of my all time favourite Nigella phrases), these ARE pigs in BLANKETS, not pigs in DUVETS.... roughly cut out into rectangles or rough squares.

Roll up the franks/sausages at a diagonal, and glaze with egg & milk solution. Bake in 220C oven for 10 minutes or so until brown.

Actually, tastewise, its nothing to shout about, as I personally prefer buttery flaky pastry, and this one, devoid of butter, tastes a bit too healthy, but when served warm, it's not too bad. I'd recommend tweaking the blankets with some butter, for a quick pastry fix. And its really fast to make, so if your audience are not so discerning, or are mainly kids, its much cheaper than using pampas puff pastry.


Tuesday, May 23, 2006

Almost Flourless Carrot Cake


I saw this recipe in masak masak's blog, and felt compelled to try it immediately, because it sounded reminiscent of a carrot cake I had in Australia years ago that was made by a friend, Shiew Ling, that was very very nice. Very carroty.

I won't regurgitate the recipe here, as you can get it from the above link. Now, for the one I made (you can see my photography is nowhere near to Masak Masak's pictures, which are always brilliant), my first bite into the cake, and I thought, "oh my goodness, this tastes too almondy". You know how almond has a very distinct taste, like almond jelly (hung ngun tau foo), and you either like it or hate it in a very durian-esque way. Hence, I wasn't sure if Masak Masak meant use more walnut or almond.

But, oddly enough, after the initial shock, this cake kinda grows on you. Firstly, it is oil-less, virtually flourless, and exceedingly healthy sounding. Hence my curiosity, how can such a cake be moist. It was moist. From the carrots, apparently. I guess you could un-healthirize it by smearing cream cheese frosting over it.....

Wednesday, April 26, 2006

Tangy Lemon Tart

This is what the finished product should look like, according to Donna Hay's Classics II


And this is what MY finished product looked like.


Anyway, the reason for the difference in the appearance, I reckon, is quite easy to explain.
1. I do not have a flan tin with vertical walls. The walls to my tin are a bit angled.
2. I did not follow her instruction to strain the lemon mixture, because I added lemon zest to mine, making it even more lemony.
3. The dent you see in the filling is probably from some kid who poked his finger in.

Was actually going to make a lemon delicious pudding for usual family dinner, but my mother mumbled something about a lemon tart would be nice. Anyway, I've noticed the tarte citron in Mr Ho costs a small fortune. I haven't tried the one there, but hey, a lemon tart is a lemon tart, probably differing only in sourness. Most commercial lemon thingies I find aren't tangy or sour enough. Probably the general SOURNESS TOLERANCE INDEX (STI) of the public is quite low.

Tart Shell.

1. 2 cups sifted flour. (actually, its going into food processor, so not sure if sifting is necessary)
2. 125gms cold cold butter, cubed.
3. about 3 tablespoons ice water.

Blitz the flour and butter in a food processor until fluffy like breadcrumbs. Use the pulse mode. Then little by little, add the ice water until it forms a cohesive dough. Watch for that split second when it transforms from crumbly texture to a doughy texture.

Refrigerate for 30 minutes, not longer. Roll out and put into a 9" diameter flan/pie tin, and bake at 180C with a layer of baking beads, rice or beans. This is called blind baking, for you novices out there.

Erm, of course, you need to put a layer of baking paper beneath the beans/rice. Oh, oh, dont forget to poke some holes into the base of the pastry, or the thing will rise like a hot air balloon.

After about 10 mins, remove the beans/rice.... I THINK the purpose of this whole exercise is to make life harder in general, and also to prevent the pastry from deforming too much. Either shrinking, or puffing up.

Meanwhile (after u put the pastry in oven), make the filling:

Filling:
3/4 cup to 1 cup lemon juice, depending on STI.
grated zest of 2 lemons (avoid the white pith, it gets bitter)
1/2 cup sugar (although donna hay says 3/4.... that might make you diabetic)
3 eggs, lightly beaten
3/4 cup cream

Actually, I reckon for a 9" diameter tin, the above quantities are a bit short. So, my suggestion, 4 eggs, and 1 cup cream

Anyway, using a double boiler set up, ie, bowl over pot of boiling water, dissolve the sugar into the lemon juice. When dissolved, add in the cream and eggs, and continuously stir for about 5 minutes.

At this point, you are supposed to strain the filling mixture. I guess you can, and then add the lemon zest in later.

When the tart base has been cooked, (about 20 minutes), lower oven to 140C. Take out tart base from oven, unless you are heat proof. Pour the strained filling mixture in, (don't forget to add in the zest at some stage), and bake for another 20 minutes on the lower heat.

Serve with vanilla ice cream, or pure cream, or eat it as it is.

So to summarise, sequence is.

1. Make pastry
2. Chill pastry
3. While chilling, grate lemon and squeeze juice, and measure filling ingredients.
4. Bake pastry
5. Start making filling
6. 10 minutes later, take out beans from pastry
7. Another 10 minutes later, take out pastry, lower oven temp, and add filling.
8. Bake another 20 minutes.

And remember this sequence for other tarts.

Monday, April 24, 2006

Alexander Inspired Oreo Cake


I really should work on my presentation, and make sure the knife is free of crumbs when cutting through a layered cake. Anyway, this particular cake was inspired by RPM Instructor, Alexander Lee, who displayed a pic of a sponge sandwich with oreo cream in the centre, but refused to divulge where he had eaten it.

So, I decided to improvise.

Ingredients:

1 portion chocolate sponge
1 portion vanilla sponge (actually, 1 choc sponge cake would be sufficient, if you can't be bothered to have muhibbah colored layerings)

2 cups whipping cream, whipped
1 packet oreo biscuits crushed
100gms dark chocolate melted

1. Prepare the sponge cake, either through cheating way, ie, use sponge mix from BAKE WITH YEN, or any bake shop. That'll be 250 gm (2 cups) sponge mix, 4 eggs, 80gms butter. Very idiot proof. Beat eggs, sponge mix (hmmm, got add water ah? cant remember) for 12 minutes. This is where a stand mixer comes in handy.

2. Bake in square or round tin.

3. While sponge is baking, whip the cream, and crush the oreos (1 packed means one tube). Depending whether you like your oreos chunky, or finely crushed.... crush accordingly.

4. Use 2/3rds of whipped cream and add in oreo mixture.

5. Melt the chocolate (with a dash of unbeaten cream) and use a portion of it to mix a chocolate cream with remaining whipped cream.

6. When the sponge cake is ready, and cooled, cut into three layers, and intersperse first layer with oreo cream, second layer with chocolate cream, and top it off with a chocolate ganache.

7. Refrigerate, and serve cold.

Tuesday, March 28, 2006

Orange Sour Cream Poppy Seed Cake For Anonymous

[Argh, after posting this, I realised I missed out an ingredient. Can anyone spot what it is??? Anyway, it's 1/3rd cup of that missing ingredient, to be added after step 4]


I wasn't really expecting anyone to ask for this recipe, as it's quite an ordinary cake in the sense that there are no exotic ingredients or fancy methods, but it is delicious eaten warm, with a dollop of fresh pure cream, and a cup of coffee. So since there was an "ANONYMOUS" request for the recipe, here it goes:

Stuff for the Cake

1. 250gms butter (that's a whole block)
2. 1½ cups castor sugar. (already reduced from original recipe)

3. 6 Avian Flu Free Eggs

4. 2 cups flour
5. 1/4 cup self raising flour

6. Rind of 2 grated oranges
7. Juice of 1 -2 oranges

8. 1 tub sour cream

How to Make

1. Beat the sugar and butter until creamy. Not sure what the chemistry behind is, but the yellow butter will turn a whiter shade of pale after beating. Don't let the butter be too soft. In our Msian weather, leaving it out of the fridge for about 5 minutes is sufficient.

2. Beat in the eggs one by one. If you don't have a stand mixer, or kitchen assistants, and only have one hand free, you can crack em one by one using one hand. Practice first.

3. You should now have a very batterish kinda mixture. Runny, eggy, pale yellow. Beat in the rind and orange juice.

4. Your mixer is done for now. Can be put aside. Stir in half the sour cream, and half the sifted flours, until well blended. Continue with remaining sour cream and flour. You might want to leave the sour cream out of the fridge for awhile. Sometimes its hard to unclump it and you get unsightly bits of chunks of sour cream in the cake.

5. Bake in preheated oven at 170C for about an hour. The usual thing. Insert skewer to test for done ness. Some people like this cake coz of the crust. I dunno why it's so crusty. Maybe the heat is too high.

6. Serve with pure cream, or vanilla ice cream I guess, BUT be warned, its very rich.

7. Workout on the treadmill for 1 hour to undo the damage.

Tuesday, February 21, 2006

Finding Substitutes


I came across this great site that I reckon is quite useful for the wannabe cook, especially in third world countries where ingredients are not always readily available. It offers you the definitions of foods, and also SUBSTITUTES for them, if the real thing is not available.

An item I've seen in many recipes, but find hard to obtain, without costing an arm and a leg, is BUTTERMILK. (it costs like RM10 for 1 litre) The other ingredient I was looking for was GUM TRAGACANTH, for modelling icing. After reading about it on the internet, I resigned myself to the fact that you will never be able to obtain it here, (since some woman from Las Vegas said she could only find it in Sydney), but to my surprise, it WAS available at cake supply haven, BAKE WITH YEN.

Cooks wannabe, you may thank me at your leisure for this wonderful discovery.

Sunday, February 12, 2006

Nigella Lawson's Chocolate Fudge Cake


Ripped from Nigella Bites, one of Nigella Lawson's cookbooks, this sinfully rich chocolate cake, is really sinful. Not only it's swimming in butter, oil, AND sour cream, the icing is ALSO ludicrously unhealthy, in its original form. Therefore I have taken the liberty of substituting the prescribed icing with a chocolate ganache, which at least omits the tons of butter and icing sugar. Though I've made it twice, once with the original icing, and the second time with the ganache, I've only eaten it the first time, and didn't get around to actually eating it the second time round, so I have no idea if it's any good, and only have the wife's word for it that it is okay.

What Goes In

Dry Ingredients to be sifted
3 1/5th cups plain flour
50gm cocoa powder (3/4 cup)
2 teaspoons baking powder
1 teaspoon baking soda

Sugars
1 cup castor sugar
1/2 cup brown sugar

Cream & Egg Mix
3 eggs
tub sour cream
1 tbspn vanilla extract

Lubricants
175gm butter, pref unsalted
½ cup corn oil
300ml cold water

Icing
Ganache
250gm dark chocolate
1/3 cup cream

OR

Original recipe
175gm dark choc
250gm unsalted butter
275gm icing sugar
1 tablespoon vanilla extract

1. Preheat oven to moderate, ie, about 170C, or mark 5 on the electrolux. Line two 8" sandwich pans. I don't know why they're called that, coz you don't make bread in them. I guess cakes in these kinda pans usually are used to sandwich something.

2. Sift the "sifting ingredients" and sugars into a big bowl. You can also try using brown sugar throughout, especially if you buy into the common belief that brown sugar is healthier.

3. In a separate bowl, or jug, whisk the egg cream combo until it resembles just that. Egg and cream combo. Ie, you can no longer tell the yolk from the albumin, etc.

4. In yet another separate bowl, (this is when having domestic help, or dishwasher comes in handy), mix the butter, oil, and water....yeah, I know, I thought it was weird too, who ever hears of mixing oil and water. The outcome would be two stratified layers, or oil and water. But don't despair. The cooking diva knows what she was talking about.

5. Chuck everything into the big bowl where the dry ingredients are sitting. Beat (with electric mixer) until its all nicely mixed and looks like a chocolate cake batter.

6. Divide into the two sandwich tins, and bake for about 25-30 minutes. I'm not sure if you're meant to leave it to cool in the pan, or on a wire rack, so to be safe, just do a bit of both....

7. For the ganache, zap ingredients in microwave for a minute, letting the choc melt.

8. Place a healthy dollop in between the cakes, and the rest to ice the rest of the cooled cake.

9. If opting for the sickly rich butter icing, melt the chocolate. Cream the butter and icing, and add the melted chocolate until it forms a nice spreadable icing.

10. Serve at room temperature I suppose. According to Nigella, if you're heartbroken, you can eat the whole cake.

Wednesday, February 08, 2006

Durian Poppy Seed Cake (Warning- Resulting in Toxic Gases)


Durian, the king of fruits, seems to be back in season after a hiatus of a few months. Usually, the initial crop probably ain't the cream of the crop, but with this cake, you do not need to use premium grade D24 breeds, but for the durian cream, yeah, it'll help to use top notch stuff. Same principle applies to chocolate cakes I guess. The liquid parts, frosting, glazing etc, should be from yummy chocolate.

If you are not a durian fan, you might as well close this window right now and go back and watch season 2 of Desperate Housewives.

The main hassle of making this cake is deseeding the durian. Especially if the flesh is too ripe, and mushy. I don't think your guests want to imagine your fingers running through the mushy flesh. Best way is to chill it a bit so that the flesh is firmer, and peels off from the seed more easily.

The Cake:

400gms of durian flesh (ie, no seeds), pureed, with a dash of milk

250gms butter
1 cup sugar

4 eggs

1½ cups flour
½ cup custard powder
½ teaspoon baking powder
1/4 teaspoon baking soda

1/3rd cup poppy seeds

1. preheat oven to 175C. that's no 5 on an electrolux. I can't understand WHY they just can't put the temperature readings on the dial.

2. use a cake mixer, cheap one will do, to beat the slightly thawed butter (in our equatorial heat, leaving the butter out for 5 minutes from the fridge will do the trick...those sydney readers, depends which season you're in), together with the sugar, until nice and creamy. (by the way, I've already reduced the sugar by half, so further reduction at your own peril).

3. when the butter and sugar is nice and creamy, let your kids have a taste. nothing like butter and sugar. yummmy.

4. adds eggs gradually, (ie one by one is not a bad idea), continue mixing until the whole mixture looks like ......eggs, butter and sugar mixed.

5. in a dignified manner, plonk in the durian puree, while resisting tempation to wallop any along the way. give it a good churn with the cake mixer again, until it's all mixed, and you can see some durian fibre stuck on your beaters.

6. stir in the poppy seeds. Contrary to popular belief, although opium comes from poppy, the only high you'll get from this is by inhaling the durian.

7. add the flour in in two batches, stirring it in until mixed. The batter should be more viscous than when before you added the flour. Obviously.

8. transfer batter to 8"round tin, and bake for 50 minutes.

9. serve with fresh durian cream, or where durian is scarce, then thick pure cream would do.

10. in about 4 hours or so, you should be emitting noxious gases, either by burping or by farting. stay away from the flame.

Durian Cream:
400gm of durian
whipping cream - half cup
Blitz together in blender.

Alternatively, whip cream separately. blend durian. mix together. This is really your call.

Monday, January 23, 2006

Artery Clogging Cream Cheese Spirals or Rugelach


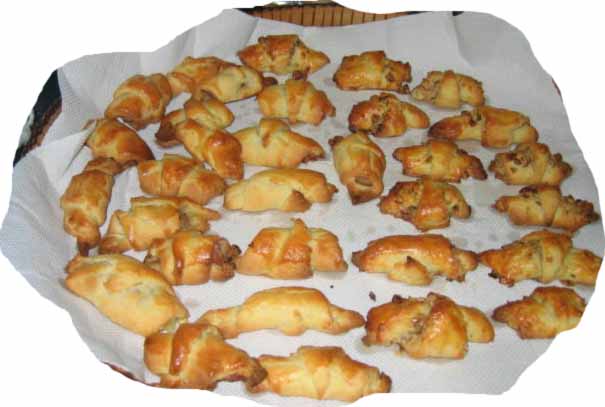
They may not look THAT appetising in the photographs, mainly coz my skill in rolling the dough into perfect crescents leave a lot to be desired, but taste wise, especially fresh from the oven, they are rather good.

The original recipe only gives the option for a sweet filling, but I took the liberty of making them half savoury, and half sweet.

Stuff:

250 gm cream cheese
250 gm butter, softened but not melted (yup, that's half a kilo of artery clogging ingredients)
3 tablespoons caster sugar

2 ½ cups plain flour, sifted

Filling:
Sweet:
1 cup chopped walnuts
2 tablespoons brown sugar (mixed into the chopped walnuts)

Savoury:
Beef bacon, bacon, luncheon meat, corned beef, whatever tickles your fancy, I'd say.

How to make:

1. Cream the butter and cream cheese in a bowl (ie, use a cake mixer and beat on high speed), with the sugar, until light and creamy. The mixture should taste....like cheesecake.

2. Sift the flours into the bowl, and mix with a spatula, until it all comes together into a clingy (like those needy girlfriends, ie, clingy) dough. Sprinkle more flour if its too sticky. Knead slightly, and divide into two portions and refrigerate for at least 30 minutes. Some books say 2 hours.

3. Roll out one portion ato about 5mm thick, and cut it into a round shape, using a plate as your template. Ie, put the plate on the rolled dough, and cut a circle.
4. Divide the circle into 12 portions... the book says 16, but I think 12 is better. My fat fingers can't handle such dainty morsels.

5. Sprinkle the chopped (finely) walnut and sugar mixture onto the circle of dough. Roll from the wide end of the piece, so that it forms a mini croissant. If using savoury filling, follow the same procedure, but with your savoury filling.

6. Brush with egg and bake in a preheated oven at 190C until brown.

7. Careful when popping into the mouth. And try to limit yourself to two pieces max, or you will have to spend an hour on the treadmill, running at 9km/h.

Wednesday, January 18, 2006

Lemon Delicious Pudding


This is a fantastically simple tangy dessert for those who like sour stuff. If you like a hint of sourness, and not a full on attack of lemon on your palate, then increase the sugar a bit and reduce the lemon juice accordingly. The pudding magically separates into a layer of light sponge cakey thingie, and a layer of lovely lemon curd.

Stuff to put in:

3 eggs, separated

60gms butter
2/3 cup sugar

1/3 cup SELF RAISING flour

juice of two lemons
grated rind of the same two lemons

3/4 cup milk


1. Preheat oven to 180C, and grease a 1 liter bowl.

2. Beat the 3 egg whites until stiff, and soft peaks form. Apparently to test done ness, invert the bowl (for a couple of seconds only), and see if the egg white mixture stays intact. If it spills....shucks, you gotta start again. But you should have an idea if you start to tilt the bowl and the egg white mixture starts flowing!!!! Cannot be contaminated. Egg white is very sensitive.

3. In a separate bowl, beat the egg yolks, butter, rind and sugar until creamy.

4. Stir in the flour. Doesn't sound like a lot of flour, but don't worry.

5. Stir in the milk and lemon juice. Don't worry, contrary to popular belief, it doesn't curdle all that much. By now, your batter will resemble some watery yellowy mixture, which doesn't at all look like cake batter. DO NOT PANIC.

6. Though the recipe says fold in with metal spoon, I usually use a whisk for this. Whisk in the egg whites into the mixture.

7. Pour mixture into the prepared pudding bowl, and (this is a pain) place the bowl in another deep baking pan with boiling water, coming up to half way of the bowl. It's called bain marie or something.

8. Transfer whole thing into oven. Bake for 35 minutes until golden brown. Careful, hot hot hot.

Serve on its own, or with cream.....

Monday, January 16, 2006

Basic Terminology, Dedicated to Kung See Lai


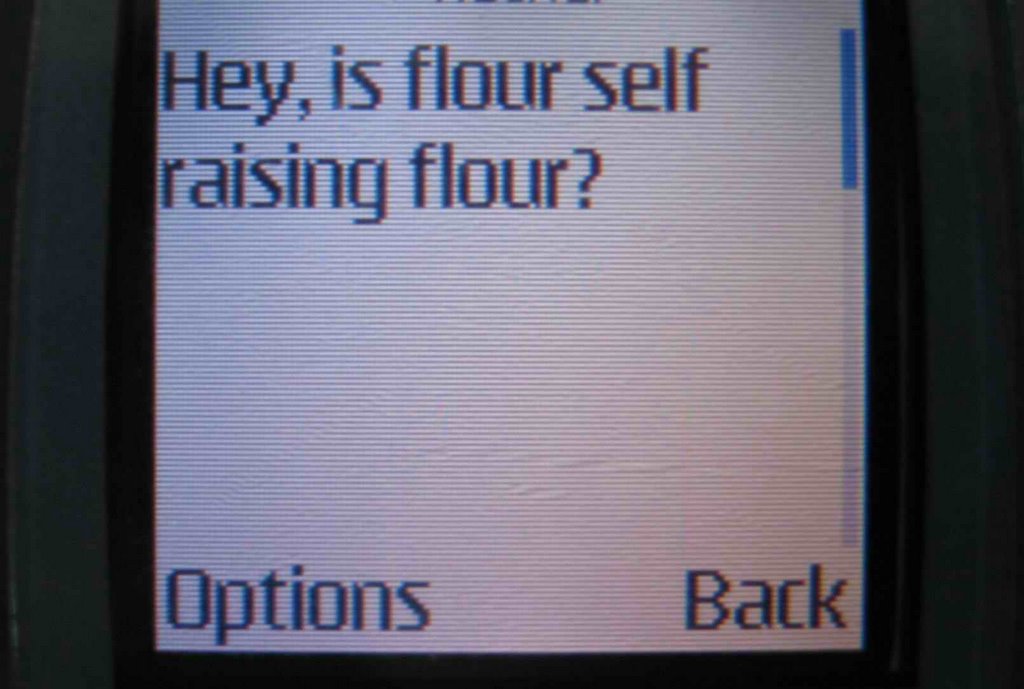
I received these sms-es yesterday from a dear dear friend, and contrary to what she said, I wasn't laughing at her. I mean, a few years ago, I didn't know what these terms meant anyway, so today's post is dedicated to her, for daring to ask, without fear of reprisal and whatever else.

Question 1. Is Flour Self Raising Flour?
Ans : Well, self raising flour is one type of flour, but usually plain flour (unless otherwise specified) is plain flour. Self raising flour can be made from plain flour by adding 2 teaspoons of baking powder for every cup of plain flour.

Which brings us to the next question:

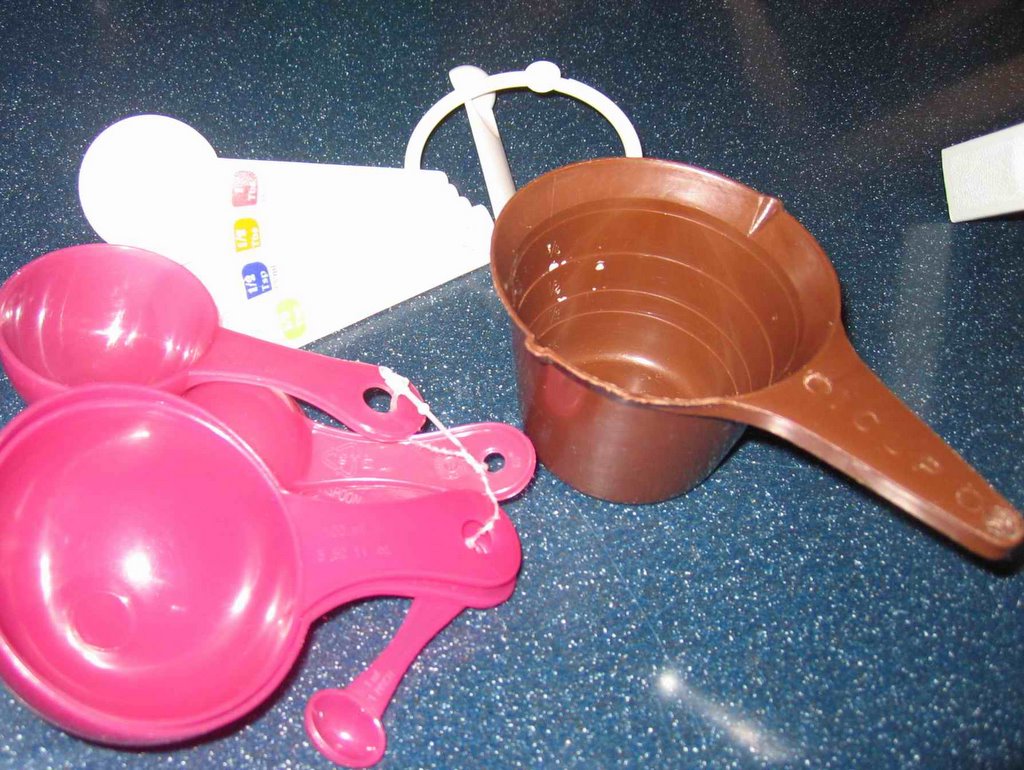
By layman's terms, the picture below IS a cup, and those spoons are table and teaspoons respectively.


These are measuring cups, and measuring spoons (pic below). A standard cup holds 250 fluid ml. I think a standard teaspoon holds 15ml. But I could be wrong. Oh, and a bit of juicy information. Unless you have a digital scale, if ever a recipe asks for 7gms of yeast, that's equivalent to 2 teaspoons.

You can even get the pink cups (its a combo of cups and spoons) in Ikea for next to nothing.


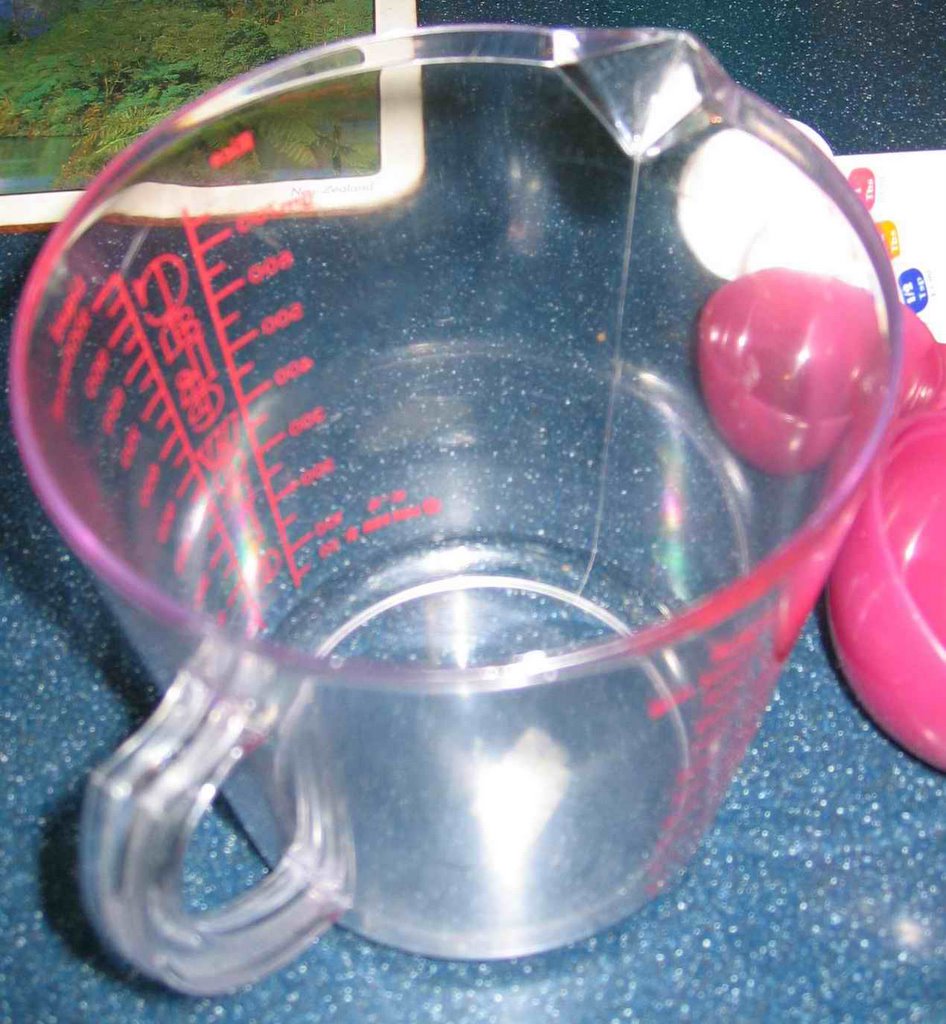
The one above is a measuring jug, which is pretty useful for various kinds of measurement. It even has the weight equivalent for sugar, flour, rice, etc.... so if some idiotic recipes ask for 200gms sugar, and you dont have a scale, presto, use the magic measuring jug.

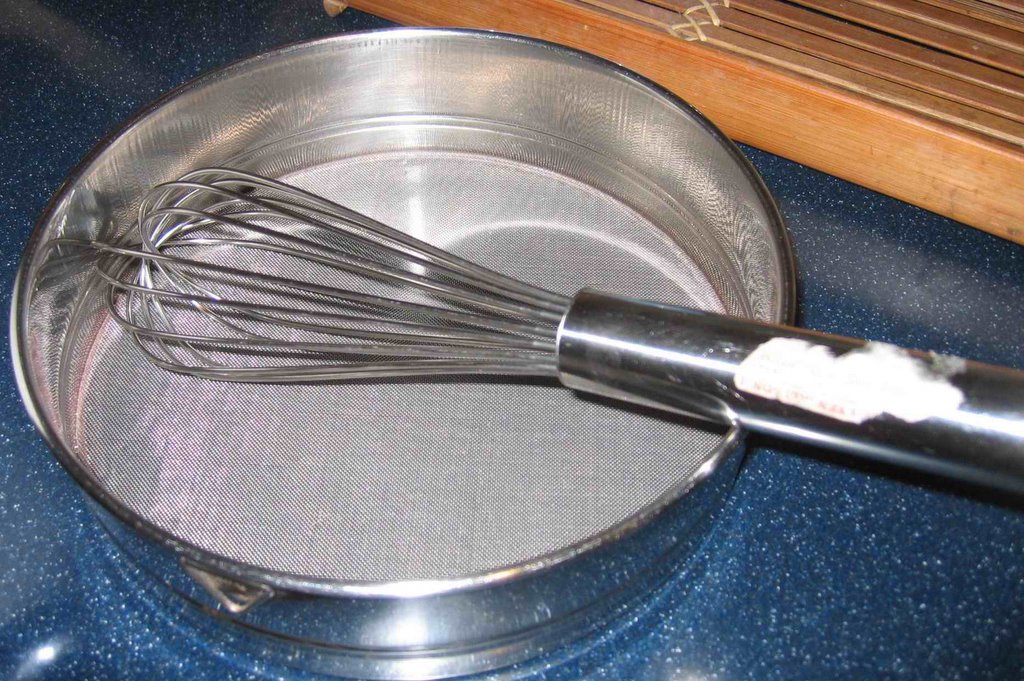
This below is a whisk, and a sieve. There are various kinds of sieves, for sifting flour. Or is it called a sift. Whatever.


Other questions I've been getting recently and some I myself used to be confused by:
Almond meal = ground almond
Cream of Tartar = NOT tartare sauce for fish. it's a powder, like talcum that you put on a baby's ass. (though these days not advisable apparently). It's one of the components of baking powder. Is used to stabilise meringues, etc.
Baking Soda = Sodium Bicarbonate = Bicarbonate of Soda. It's like Tolkien referring to a particular character by myriad names. gandalf, mithrathir, whatever whatever.
Confectioner's Sugar = Icing sugar
Buttermilk = STILL DONNO what the heck it is....
Baking Powder is NOT baking soda.


Hope you have been enlightened.

Wednesday, January 11, 2006

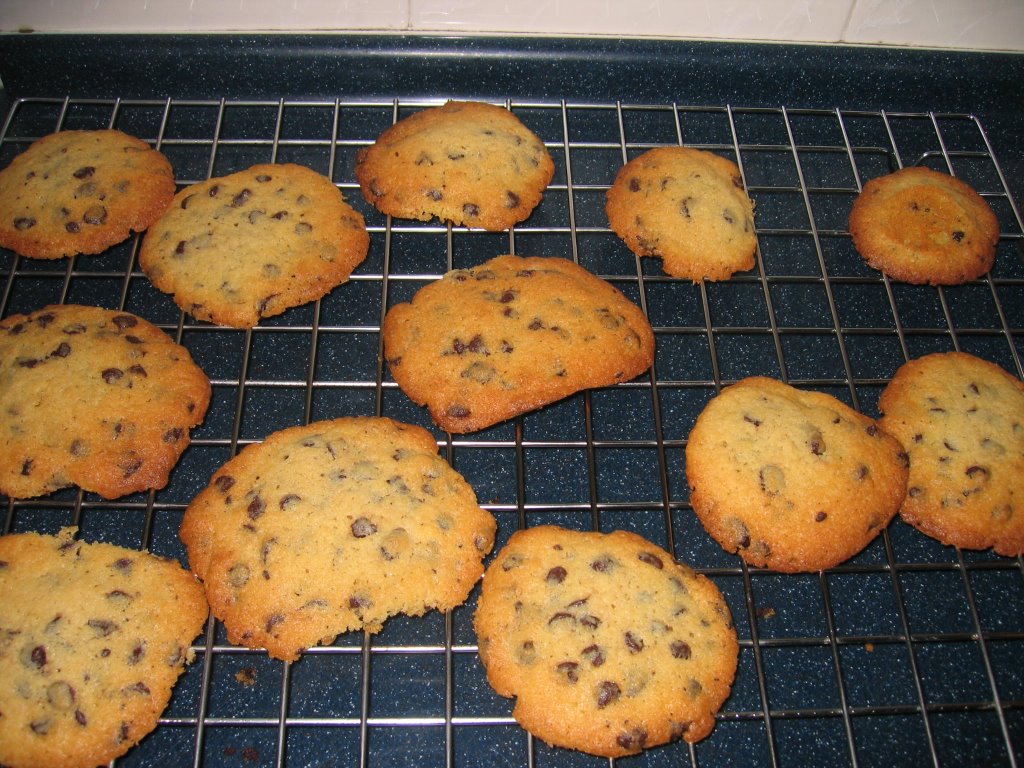
Quickie Cookie


There's nothing quite so comforting as the smell of cookies in the oven, with the subtle aroma of vanilla, and butter wafting through the air. And that first bite into a warm, freshly baked cookie as it melts in your mouth. And that cup of warm milk, as you watch the snowflakes fall through frosted windows. The kids rush in, faces flushed from the snow burn, after building their snowman......

[wakes up from dream]

The kids rush in... after swimming, screaming, "we are hungryyyyyyyy", burnt from hours of exposure to ultra violet radiation. Bring out the ice milo....

Anyway, this is a great and fattening snack, especially if you have kids you want to fatten up, (like my niece and nephews).

Group A
140 gms butter, cold
2/3rd cup brown sugar
1 egg beaten
1 teaspoon vanilla essence

Dry ingredients
1½ cups flour
1/2 teaspoon baking soda
chocolate chips, according to how chocolatey you want it to be.


1. Preheat oven to 180C

2. Blitz Group A ingredients in a food processor, until well mixed. Transfer the glob to a mixing bowl.

3. Sift the flour and baking soda into the mixing bowl, and mix with a plastic spatula, until a cookie dough is formed. Chuck in the chocolate chips. Mix until well mixed, like a chap chong child.

4. Drop heaped teaspoons of dough onto baking tray, lined with baking paper. Bake for 10-12 minutes, until brown.

5. DO NOT PANIC, first time bakers, if your cookies are soft as toilet paper in the rain.... when you first take them out of the oven. I'm not sure what the chemical or biological process is, but when you transfer them to a wire rack, and let them cool, they harden. So they start off hot and soft, but eventually harden. Yup, like the male anatomy.

6. Eat with caution, because they probably are quite fattening. My guess is, one cookie = 10 minute jog on the treadmill, or 20 minutes body combat, or 10 minutes body attack. Feed liberally to skinny children, but do not let fat kids have more than one.

MAKES about 18.
Preparation time : 5 mins
Baking time : 10-12 mins.

Friday, January 06, 2006

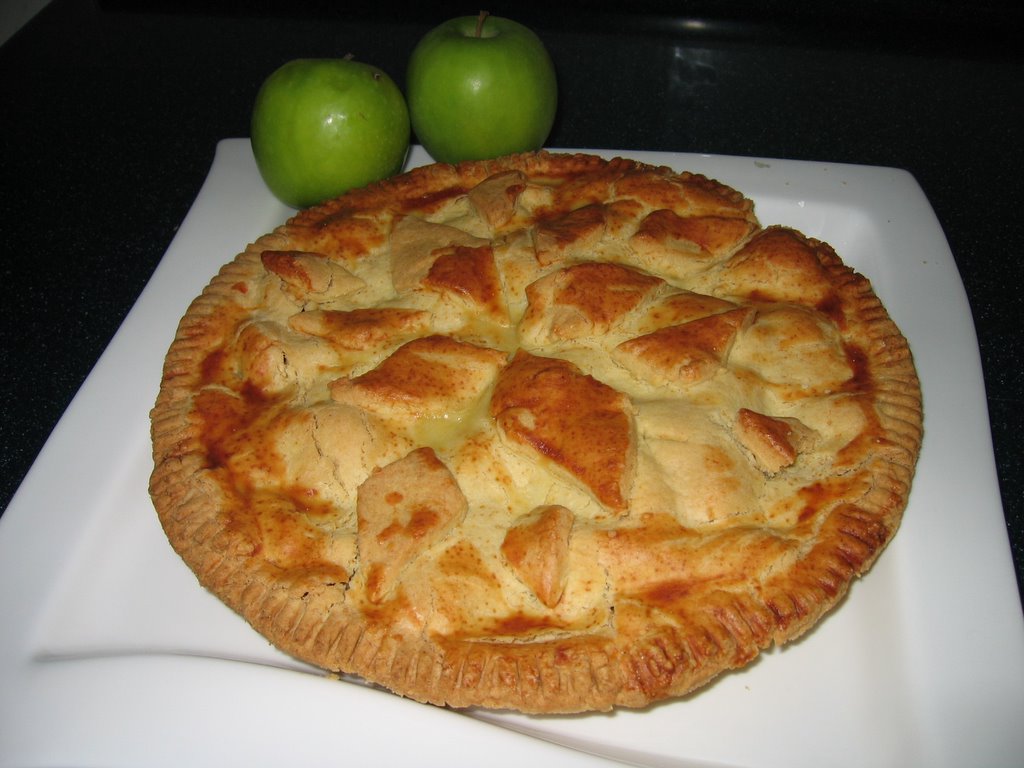
Easy As Pie - Apple


I guess next to chocolate cake, one of the most politically correct desserts would be apple pie. It's like the chicken and fish equivalent for meats, most religions allow it, and most people eat it. Serve a cheese cake, and you get all the fussy eaters declining it, citing reasons from "sou" (Cantonese), to "lactose intolerance", to not liking the chilled variety, but liking only the baked variety, or vice versa.

So, apple pie. Quick, cheap(-er than cheese cake) and easy.

Pastry:

2½ cups flour, sifted
150gm butter
2/3rd cup icing sugar
1 egg beaten

Filling:

6-8 granny smiths (depending on size)
2 red apples (fuji, delicious, anything really)
3 tablespoons sugar
1-3 teaspoons cinnamon, depending on individual taste
Lemon peel from one lemon, OR
3/4 cup raisins
2 tablespoons apricot jam


1. Chuck in flour, icing sugar and chopped butter (cold) into food processor. Blitz until it looks like one material, ie, breadcrumbs, and you can't see any butter bits anymore. With the motor running, pour in the egg. After about 15 seconds, the dough should form into a lump, or ball, and start coming off the sides of the food processor bowl.

2. Scrape all the dough out, roll into a disc or ball, and refrigerate for 30 minutes or so.

3. Get your maid, if you have one, to skin and slice the apples. Slice the apple into 1/12ths. (ie, quarter, then 1/3rd each quarter. However, if you like large chunky apple pieces, then cut into 1/8ths.

4. Depending on whether you like your apples soft, or crunchy, cook them in a large pot, infusing it with the cinnamon and sugar. If you want them soft, cover the pot with a lid, and go read a magazine for 10 minutes. If you do not want the apples too soft, cook until the apples are tender, but are no where near disintegrating.

5. Drain, and chuck in the lemon peel, or raisins, and mix. Let cool slightly.

6. Roll out 3/5th of the pastry to line the base of 8" diameter pie tin. Spoon the apricot jam at the base. Fill the base with the apples. Roll out remaining pastry and cover. Brush with either beaten egg, or milk. Usually I use the latter, coz I wouldn't know what to do with remaining egg.

7. Bake in moderately hot (185C) oven for about 25-30 minutes, until nice and brown. If not worried about diabetes, sprinkle castor sugar over the top after removing from oven.

8. Serve with pouring custard, or fresh cream, or vanilla ice cream or with any of the three combinations.

Wednesday, January 04, 2006

Molten Lava Flourless Chocolate Cakes


Ingredients For Cakes:
180gm butter, 250 gm dark chocolate, 1 cup caster sugar - Group 1
1 cup almond meal (that's almond crushed to breadcrumbs like), 1 cup cocoa, 5 eggs- Group 2
optional for molten centres - 200 gm dark choc, 1/2 cup cream - Group C


Molten Centres
A day ahead, melt the group C ingredients in double boiler setup, (ie, bowl over pot of simmering water). Alternatively, just chuck everything in a glass bowl and zap in a microwave for 1 minute. Stir the chocolate mixture till mixed.

Refrigerate. When cool and pliable, shape into cubes or balls the size of cherries. large cherries. i just cube em. as in, i refrigerate them into a tray, and cut them into cubes about 2cmx2cmx2cm.

Cakes itself :
Sift cocoa and mix together with almond meal in a bowl.
Melt group 1 ingredients in a heavy pot, on low heat, until sugar, butter and chocolate have all melted into a glossy saucy yummy texture.
Pour the aforementioned chocolate sauce into the cocoa almond duet.
Whisk together to combine. Actually, this is good exercise for the arms, because the mixture gets a bit thick, and its like stirring glue, or dodol.
Add eggs one at a time. Continue whisking. Whisking may not be accurate. Stir (like a witch does to a cauldron) with a whisk, in a movement that is a combo of beating, and stirring.
After the 2nd egg, you'll be wondering, oh dear, have i got it wrong, coz the mixture will look all lumpy and dog-foody....but fear not, you are on the way to success. By the time your 5th egg goes in, the batter would be lovely and smooth, and can be scooped out with a 1/3rd cup, which you should then pour into a greased and floured muffin pan (the standard muffin size, not the obscene big ones that you get in developed countries, or coffee bean).

I think you should get about 15 nos. which is a bit of a pain, coz usually, muffin trays come in 12. you can either 1. lick up the rest of the batter, 2. just chuck the remainder into a small baking tin, 3. use another muffin tray.

Your oven should be preheated to about 140C, which is moderately low. After your batter has settled into the muffin pan, insert your frozen chocolate cherry or cube into the centres. Voila.

Baking time should be about 20 mins. Serve with fresh cream, or vanilla ice cream, or both, depending on your calorific allowance

Friday, December 23, 2005

Gingerbread Cookies for the season


Tis the season to be merry. Usually, I'm not a fan of gingerbread, but these are quite palatable. Recipe is more or less from Donna Hay's Classics II.

125gm softened butter
2/5th cups brown sugar (slightly less than 1/2 cup)
2/5th cups golden syrup
2½ cups flour
2 teaspoons ground ginger, sifted into the flour
1 teaspoon sodium bicarbonate, aka baking soda, aka bicarbonate of soda, sifted into the flour

Icing - 1½ cups sifted icing sugar, 2 tablespoons clean water.


1. Cream the butter and the sugar until light and fluffy. That means, use a cake mixer to beat it together la. Preheat oven to about 190C. That's mark 5½ on an electrolux oven.

2. Chuck in rest of ingredients. ie, flour and other dried stuff. Pour in golden syrup. Use a spatula to combine the ingredients until it forms a cohesive dough. Can also use hands, but make sure they're washed, and haven't been in unsavoury places, like your nose.

3. Wrap in gladwrap and refrigerate for about 20 minutes.

4. Roll out the dough into 1/4 inch thickness, on a sheet of non stick baking paper. Can either roll it in BETWEEN two sheets, or just roll on one sheet. Ie, the top is exposed. Use cutters to cut.

5. Place on baking tray, and bake.

6. Mix the icing ingredients. Have faith, two tbspoons of water and that amount of icing sugar WILL actually yield a flowy icing paste, that you can use to pipe your decorations.

7. Add food coloring, preferably non carcinogenic type, and decorate at will.

Thursday, December 22, 2005

My Green Ondeh Ondeh Balls


These are great fun to make, although I've always wondered prior to making them, how they ever got the gula melaka into the centres. I assumed it was injected in, or something. Anyway, upon the insistence of my precocious son, we one day tried it out, using the recipe from COOK MALAYSIAN by Lee Sook Ching.

Problem with this recipe is, it did not specify makes how many. Anyway, using my intuition, it looked like it DIDNT make very much, so I adjusted the quantities in proportion:

12-15 pandan leaves, pureed and juice extracted. (probably need to add a little water if using blender)
Gula Melaka - 4-6 tablespoons. Use best quality if you can find it. Chop finely and mix with
Caster Sugar - 3 teaspoons

Glutinous rice flour 1 cup
Coconut - 2/3rd grated

1. Believe it or not, just mix the glutinous rice flour with the pandan "juice" until it forms a cohesive dryish dough, adding a little water here and there along the way. Initially it might just form clumps of green flour stuck together.

2. Meanwhile, bring a pot of water to boil. ( I usually pre boil water in a kettle first, then let it boil on gas stove. Somehow, I think wasting electricity is not as bad as wasting gas).

3. Roll the dough into a long sausage, 1 inch diameter. Cut into small pieces, about 1 inch apart as well. Like playdough, shape it into a disc, and place the gula melaka & sugar mixture into the centre. Close the disc to shape a ball.

4. Chuck the balls into the boiling water, and wait till they float. There's really quite a sense of euphoria when they do. Fish them out, toss until dry, do not try to juggle with bare hands. Toss in grated coconut. All flaws will be covered once its coated in the snow white coconut.

Might not be exactly commercial standard, but tastes quite good, and the kids LOVE making this. OH, YA, it makes only about 13-15. Hardly worth the effort, so I suggest doubling everything. (The flour, mainly)

Wednesday, December 21, 2005

Orange Mocha Brownies, Dedicated to Rachel Tsan

Line a square cake pan, simply, with baking paper overhanging from both sides. ie, north and south. OR east and west.
Preheat oven to moderate. Dunno what it is on your oven, but that's about 170C.

Ingredients:
1½ cups plain flour, sifted
2/3 cups cocoa (that's two thirds, not two OR three)
1 tablespoon coffee powder (don't bother putting in expensive stuff)
1½ cups caster sugar (or less)
250 gms butter, softened (leave at room temperature for abt 15 minutes)
4 eggs lightly beaten
1 tablespoon vanilla essence/extract if you're feeling generous
rind and juice of one orange (ie, grate the orange skin, and juice the orange)

1 cup of chopped dark and milk chocolate mixed.
(Alternatively, use chocolate buttons, or chocolate chip, but make sure its of good quality)

Frosting:
200 gms good quality dark chocolate, chopped for melting
1/4 cup cream
2 tablespoons or more, of brandy, or kahlua, or whatever alcohol tickles your fancy. or without.
1 tablespoon coffee powder. (Might want to step it up a notch and use gold instead of classic)

1. Believe it or not, mix together all the ingredients above (minus frosting stuff), except for the orange juice, and chocolate bits. As in mix with a cake mixer. You should get a lovely batter, of frosting consistency. Do not panic.

2. Chuck in the orange juice (should be about 1/2 to 3/4 cup), and rind, if you haven't already. Mix again, and the batter should be a bit more flowy.

3. Stir in the chopped chocolate bits. They shouldn't be too large a chunk, but not too fine either. The size of half a malteser would be about right.

4. Pour into pan, scrape off batter with spatula. Lick bowl with dignity.

5. Bake for about 25 minutes. Bear in mind when you put a skewer through to test for doneness, you may have penetrated some melted choc bits. This doesn't mean the brownie is not completed. Poke a few more spots at random to see if cooked. Or touch the surface, if springy, probably done.

6. While waiting for it to bake, chuck the frosting stuff (minus booze) into a glass bowl. Zap all ingredients in microwave for about a minute, on high. The chocolate should be melting, and the cream, warm. Just continue stirring (outside the microwave, of course) until you get a lovely chocolate sauce. Chuck in the booze for the buzz.

7. After cooling the brownie slightly, pour over the frosting and let it sit until you want to serve it. Serve with fresh cream, or vanilla ice cream, or whatever you like. Satay sauce, perhaps, or sambal. Your call.